
The Illusion Of Easy DIY Clothes: Why Most Flips Fail

Where Most People Butcher The Basics
You want to believe thrift flipping is effortless because that means you can monetize your eye without real skill. The mechanism that kills most attempts is simple: people cut and sew without understanding that oversized garments fail not because they’re too big, but because their fabric lacks the internal structure to hold a new silhouette. You’re fighting physics, not just size.
Oversized blouses and tees are cut with excess fabric distributed across the whole piece to hang loose. When you remove material, you don’t just lose volume—you remove the anchoring points that control how fabric behaves on a body. Most flippers treat this like a math problem: measure, cut, done. They ignore that a vintage oxford shirt holds shape differently than a modern rayon blend, and neither behaves the way they expect once you’ve compromised the garment’s original construction.
Fabric Drape Determines Your Design Range

Think of garment architecture like load-bearing walls in a building: remove the wrong section and the whole structure fails, not because you removed too much, but because you broke the load path. The fabric’s weight, fiber content, and weave directly determine what silhouettes work and which ones collapse into formless puddles on a body.
A heavyweight cotton poplin from a 1990s oversized shirt can support a cropped, structured silhouette because the fabric itself has enough body to hold an edge. That same design attempted on a thin rayon blouse from the 2000s becomes baggy and shapeless because rayon drapes, it doesn’t hold. The flip fails not because the idea was bad, but because you chose wrong fabric for the form you’re trying to create. Before you cut anything, feel the weight, pull the fabric on the bias, and understand that you’re locked into specific design outcomes before the scissors touch cloth.

The Deconstruction Protocol: Seeing Opportunity In Chaos

Where To Start Ripping
You want to believe deconstruction is intuitive. It isn’t. You’re scared you’ll destroy fabric worth salvaging, so you hesitate and waste time. The real mechanism is this: seam ripping is a forensic exercise. You’re reading the garment’s construction to find where the builder made it easiest to undo. Start at side seams, never at stress points like armholes or necklines. Side seams hold the least structural weight and give you the most usable fabric when separated.
Cotton blouses and oversized tees use simple running stitches on side seams—predictable, single-thread runs that pop cleanly. Work from the bottom hem upward. You’ll hit the armpit area where stitches tighten. Stop there. That junction is where fabric grain changes and seams anchor to reinforced areas. Forcing past it tears the weave. The goal is to extract two large front and back panels intact, not to deconstruct every inch. Once you pull the side seams, you’ll see what else stays worth keeping.
Salvageable Fabric Versus Dead Weight
Most thrift flippers waste time debating what counts as usable. Here’s what actually matters: fiber content, panel size, and damage location. A 90s oversized linen blend blouse gives you two front panels roughly 18 to 22 inches wide after seam removal. That’s workable. Polyester crepe from the 2000s? The fibers hold memory. You’ll fight wrinkles the entire construction. Damage determines everything else. Small holes near seams disappear when you fold that seam line into a new garment. Stains in the center of a panel are dead weight unless you’re intentionally designing around them.
Pull the sleeves off next. Most thrift blouses have basic set-in sleeves that separate at the armhole seam. You get usable sleeve fabric 7 to 10 inches wide depending on the original fit. Collars and cuffs are labor-intensive to rip and often too small to justify the time. Discard them unless you’re building a specific collar detail into your design. Measure your salvaged panels before you move to assembly. Panels under 15 inches wide force you into piecing, which multiplies stitching and weakens the flip top structure.
Beyond The Hem: Advanced DIY Clothes Design Principles

Cutting Against The Grain
You want people to notice your flip top because it looks intentional, not accidental. The mechanism is asymmetry. Most thrift blouses have bilateral symmetry by default, so the moment you break it, the eye registers “this was designed.” Asymmetrical cuts work because they signal deliberation. A hem that sits at different lengths on each side, or sleeves that taper unevenly, forces the wearer’s body into compositional tension. This isn’t trend chasing. It’s the same principle behind Japanese fashion in the 1980s and 90s, which rejected Western symmetry as oppressive.
Start with the front panel. Cut one armhole slightly lower or wider than the other. Keep the side seams intact initially. This preserves structural integrity while creating visual imbalance. The back can stay symmetrical, which means the flip top still functions as a reversible piece. You’re not removing material symmetrically from both sides, you’re removing it strategically from one side. This distinction matters because it forces you to understand proportion instead of relying on matching.
Mixing Materials For Surface Depth
The consensus advice says “combine different fabrics for contrast.” That’s hollow. The real principle is friction. Mixing disparate textile weights and weaves on a single flip top creates visual weight distribution that compensates for the lack of color. Take a 100% cotton oxford cloth blouse from the 1990s and a linen tee from the 2000s. Cotton has a slight sheen and structure. Linen reads flat and has visible texture. When you cut panels from each and sew them into a single flip top, the eye doesn’t see “mixing fabrics.” It sees dimensional complexity. The friction between materials makes the piece harder to categorize, which is the actual value.
Source panels from garments with opposing nap directions. A brushed cotton panel next to a mercerized cotton panel creates surface behavior that changes based on viewing angle and light. This isn’t decoration. It’s material honesty. Sew these panels as front and back flips, so each orientation reveals different textural information. The mechanism is that mixed materials force the wearer to own their choices explicitly. There’s no hiding behind fabric uniformity.
The “Upcycle Clothes Diy” Blueprint: From Concept To Wearable
Mapping Your Transformation Before Cutting
You want permission to skip the planning phase because you think you can visualize the final product. You can’t. The mechanism here borrows from architecture: load-bearing walls. In a thrift flip top, your seam placement is the load-bearing wall. Cut it wrong and the entire garment fails structurally, not aesthetically.
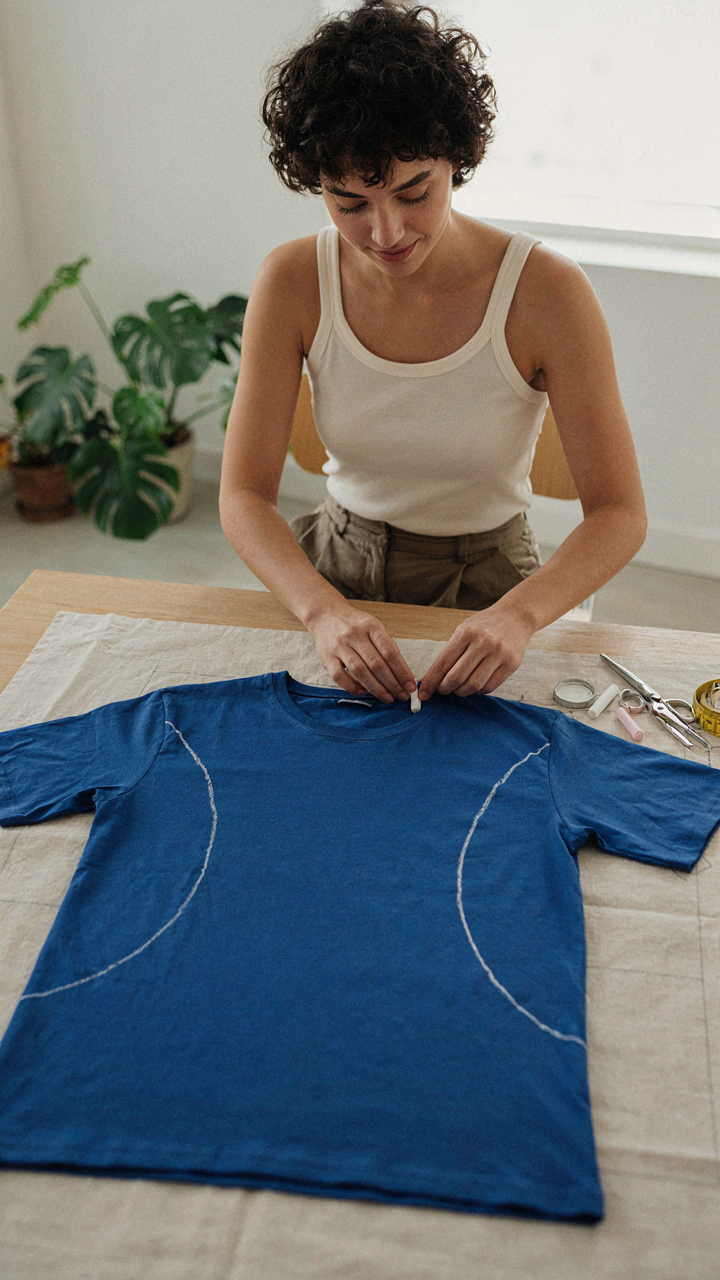
Start by identifying the oversized blouse or tee’s natural seam lines. Lay the garment flat. Mark where the shoulders sit relative to your own shoulders. Mark the side seams. Trace the neckline. Use a tape measure to establish your actual shoulder width, bust, and desired crop length. Write these measurements directly on the garment with fabric chalk. This becomes your cutting map, not your guess.
Techniques That Actually Control Fit
Common advice says “just take in the sides.” That’s incomplete because it ignores how fabric behaves when compressed. Binding, tapering, and darting each create different silhouettes from the same piece of material.
- Side seam tapering: Gradually narrow the side seams from armpit to hem, removing bulk without creating visible bunching at waistline or chest.
- Shoulder dart insertion: Sew a triangular dart from shoulder point toward the armpit to lift sagging fabric on oversized shoulders without resewing the entire armhole.
- Binding the raw edge: Fold fabric over the cut edge and stitch it down to create a finished hem that prevents fraying and defines the crop line cleanly.
- Strategic gathering at hem: Introduce small pleats or gathers at the bottom to control volume while maintaining the cropped proportion.
- Neckline narrowing with facing: Add an interfaced facing to the neckline opening to tighten it without distorting the shoulder or armhole structure.
The execution order matters. Always taper or dart first, then bind or finish edges. Reversing this adds unnecessary steps and creates visible strain marks. Measure twice before each cut. Once you remove fabric, you cannot add it back.
Mastering The “Sewing Projects Clothes” Game: Tools And Techniques
The Needle And Thread Reality
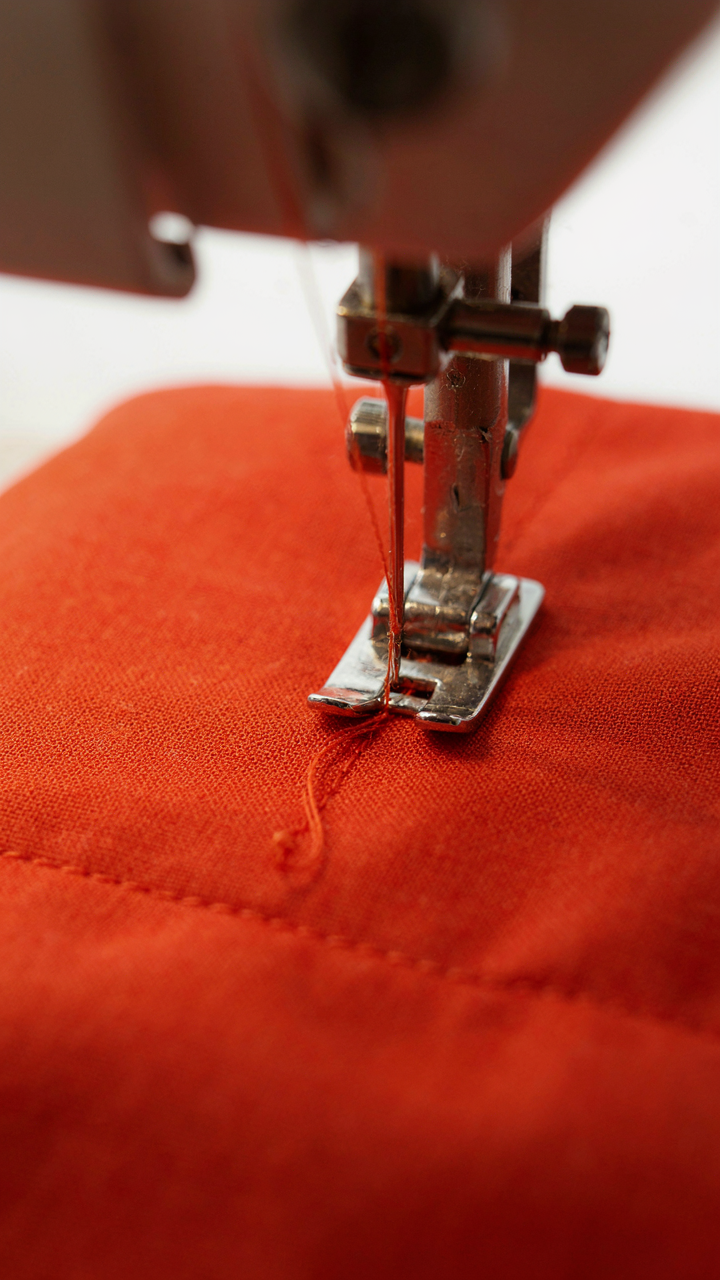
You want the tools to matter more than your skill because that feels safer. The mechanism is simpler: cheap tools don’t fail because they’re cheap. They fail because they’re imprecise, and imprecision compounds. A dull needle creates fabric snags that ripple through your entire seam. A warped presser foot throws tension off by millimeters, which looks amateur on a finished flip top. You need tools that hold tolerances, not brands that hold status.
Start with a needle set designed for woven fabrics, size 70/10 for lightweight shirt material and 80/12 for heavier blouse fabric. A seam ripper costs three dollars and saves hours of unpicking mistakes. Fabric scissors matter more than most people admit because kitchen scissors degrade thread fibers at the cut edge, weakening seams before you even start. Thread matters: polyester breaks less than cotton on stretch seams, and mercerized cotton shows better on visible topstitching. A measuring tape, pattern paper, and tailor’s chalk complete the core setup. These aren’t optional upgrades. They’re the difference between a flip top that holds together and one that unravels at the armhole.
Stitches That Actually Hold
The common advice says master the straight stitch first. That’s incomplete. A straight stitch fails under tension because it has only one thread line holding the fabric together, which is why garment factories use a lockstitch or backstitch formation that uses thread on both sides of the seam. Think of it like structural engineering: a single load-bearing wall collapses easier than a wall braced on both sides.
For flip tops cut from oversized blouses, the backstitch is your foundation. It creates a double line of thread and prevents seams from splitting during wear. Use a 2.0 millimeter stitch length on woven fabric, which sits between too-tight stitching that puckers and too-loose stitching that gapes. A topstitch done with thread one weight heavier than your seam thread reinforces stress points like necklines and armholes. The whip stitch or ladder stitch closes openings invisibly and handles the stretching that happens when you turn a flip top right-side out. Run a backstitch along the seam line before turning to lock it in place permanently.
The Economic Arbitrage Of Thrift Flip: Value Creation

Undervalued Assets And Market Inefficiency
You want to believe thrift flipping is passive income. It isn’t. Game theory explains why: thrift stores price inventory based on category, not condition or potential. They apply the same markup logic to a stained 90s oversized blouse as a pristine vintage linen shirt. The inefficiency exists because thrift pricing ignores end-user transformation. Your job is exploiting that gap.
The real mechanism is information asymmetry. Thrift staff sort by decade and fabric type. They don’t evaluate what a garment becomes after reconstruction. A $3 oversized tee with intact seams, good cotton weight, and neutral color sits in the same pile as damaged goods. You identify the specific attributes that signal reconstruction potential: shoulder seams that won’t split when you crop them, collar structure that maintains shape when modified, sleeve proportions that work as standalone pieces. This is selective sourcing, not luck.
Effort Stacked Against Actual Return
The common advice ignores this hard truth: most thrift flips fail ROI math when you count actual hours. A two-hour sourcing trip plus thirty minutes of modification equals two and a half hours of labor. If you price the flip at twenty dollars profit, you’ve earned eight dollars an hour. That’s below minimum wage in most markets.
Real ROI surfaces when you layer three mechanisms: batch processing (modify five garments in one session, not one at a time), material cost multiplication (one blouse generates two flip tops, doubling output), and pricing discipline (only source items you can flip for minimum 300 percent markup above your time investment). Track these numbers per piece. If a garment doesn’t hit that threshold before you buy it, leave it on the rack.
DIY Vetement That Doesn’t Look DIY: Professional Finishes
Seams That Read As Intentional
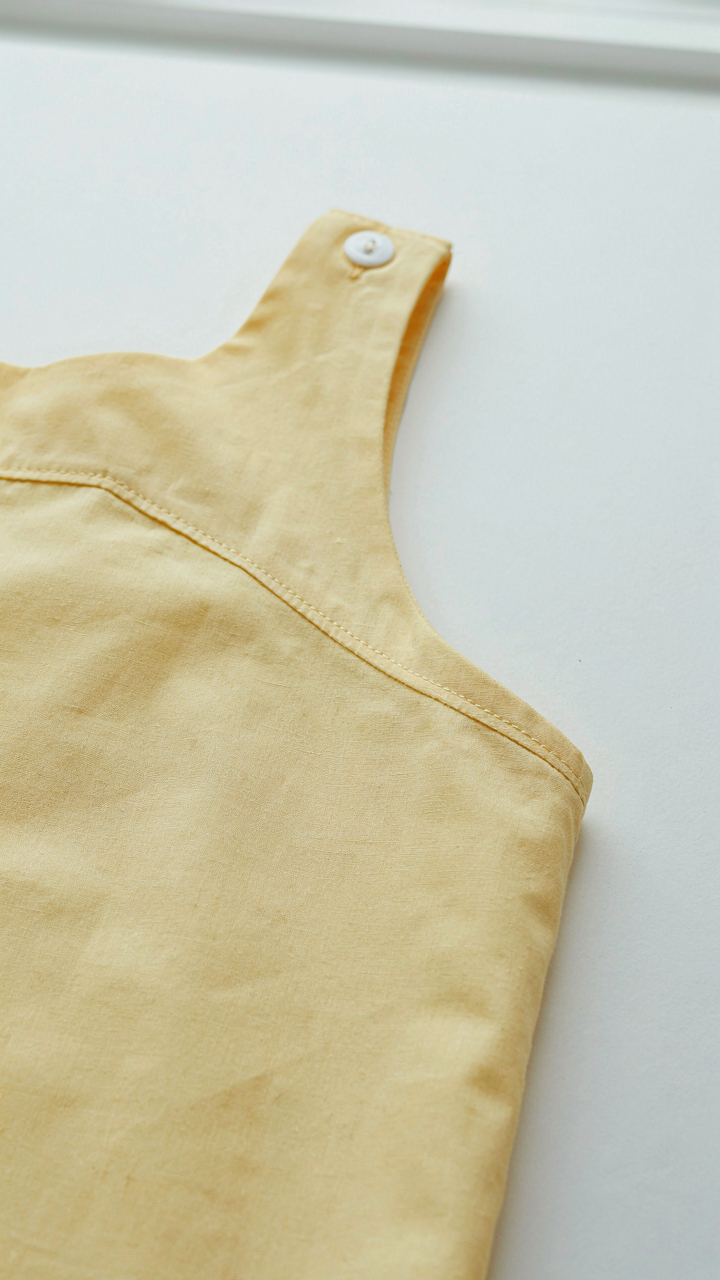
You want people to assume you paid someone to make this. That’s the real reason you care about finishing here. The mechanism is simple: raw edges and visible stitch lines read as amateur immediately because they violate the baseline expectation of garment construction. Your eye catches the slip before your brain consciously registers it.
French seams are the practical fix for most flip tops cut from oversized blouses. Sew two pieces right sides together, trim the seam allowance close, then fold and sew again with the raw edge now tucked inside. The result looks factory-made from the inside out. This matters because anyone wearing your piece will feel the quality when they move, and quality is what separates a flip from a trend piece.
Hardware That Serves The Form
Buttons and snaps should earn their placement, not decorate it. Slapping embellishments onto a flip top because you see it online means you missed the structural reason those details exist in original Vetement pieces and contemporary high-low brand work.
Closures work when they solve a functional problem first. A snap at the shoulder keeps the piece from sliding during movement. A hidden button closure at the back neckline prevents the top from gagging in wear. Grommets create anchor points for tie details that prevent fabric bunching. Each addition must justify itself through mechanics before aesthetics. Sew closures through all layers, reinforce with a backing square of bias tape, and test the stress point three times before calling it done.
The DIY Fashion Clothing Manifesto: Your Personal Brand

Building A Recognizable Flip Aesthetic
You want people to recognize your work before you sign it. That’s the real reason you care about signature style, and it’s the only reason it matters. In design systems language, this is about creating constraints that function as filters. Your signature emerges not from doing everything, but from repeating the same intentional choices across different base pieces. When you always convert oversized blouses using the same neckline treatment, sleeve length, or seaming detail, buyers start associating that move with you, not with luck or accident. The mechanism is simple: consistency builds recognition. Recognition builds demand.
Most advice on “finding your style” is useless because it treats style as self-discovery. It’s not. Style is a deliberate protocol you choose and execute repeatedly until it becomes invisible. Pick one defining characteristic of your flips—a specific crop height, a signature tie-off method, a consistent fabric pairing—and use it on at least 80 percent of your pieces for the first month. This isn’t limiting. This is how you build the visual association that separates you from the noise of generic thrift flips flooding every resale platform.
Turning Process Into Proof
Documenting your thrift flip process does one thing nobody states plainly: it moves you from product vendor to method vendor. When you show the before state of an oversized blouse, the exact cuts you made, and the reasoning behind them, you’re not just selling a finished top. You’re selling the fact that you have a system. People don’t follow consistency by accident, and buyers know this. A photograph of your work laid flat next to the original garment, timestamped and repeated, becomes your portfolio. It proves you aren’t reselling with minor alterations. It proves you’re manufacturing a specific output.
Start with one platform and document five consecutive flips end-to-end: the original piece, your pattern notes, the cutting phase, the construction, and the final product. Include measurements if they’re standard across your pieces. This isn’t content marketing. This is evidence. When someone sees the same workflow repeated five times, they understand you’ve reverse-engineered a reproducible process, not stumbled into five good outcomes. That distinction is why portfolios built on process documentation command higher prices than portfolios built on finished product alone.
Ropa Upcycling As A Path To Sustainable Style

The Math Behind Textile Waste
You care about this because it signals you’re not part of the wasteful majority. The real mechanism is volume. The fashion industry produces roughly 92 million tons of textile waste annually. Thrift flip tops intercept this cycle at the source by converting dead inventory into wearable products. You’re not saving the planet by flipping one blouse. You’re participating in a closed loop that reduces the demand signal factories receive.
Oversized blouses and tees represent the most abundant category in thrift stores because they don’t sell retail. Department stores clearance them at loss. Donors dump them by the bag. This inventory surplus is where the opportunity lives. By converting these pieces into fitted flip tops, you reduce the percentage of garments destined for landfill or secondary export markets where they saturate developing nations’ markets and collapse local textile production.
Building Intentionality Into Your Closet
The common advice says buy less and choose better. That’s incomplete. Better means knowing the origin of each piece and its future state. A thrift flip top forces this calculation because you must commit to reconstruction before purchase. You can’t impulse buy something you might alter. That friction is the feature, not the bug.
Conscious wardrobing isn’t about moral purity. It’s about reducing decision fatigue and cost per wear. When you flip a thrift top, you’re anchoring that piece to a specific silhouette that matches your body and lifestyle. You eliminate the gap between intent and reality that destroys most wardrobes. The mechanism is simple: choose, alter, wear repeatedly, then pass forward. Each step requires deliberate action.
The Real Obstacle Isn’t Your Skill; It’s Your Addiction To External Validation

You don’t need permission to cut up a thrift flip top and sell it. You need to stop waiting for someone online to validate the idea first. That voice in your head saying “what if nobody buys this?” is the real enemy, not your scissors. Post one listing today without overthinking it. The market doesn’t care about your doubts, only your output. Stop performing and start producing.