

The Myth Of Easy Visible Mending

Why Most Visible Mending Fails
You want people to notice you fixed something instead of discarding it. That’s not wrong, but it’s what makes most sashiko mending look broken instead of repaired.
The real problem: people treat sashiko as decoration first and structural repair second. They run thread in loose geometric patterns, skip reinforcement layers, and stop stitching before the hole is actually sealed. The fabric around the damage tears wider because the thread has no tension or density to distribute force. The mend collapses within weeks.

Visible mending fails because beginners prioritize aesthetics over load-bearing capacity. Sashiko evolved in Japan as a practical reinforcement technique for work clothes, not an art project. The stitch pattern only matters if the thread first creates a barrier that stops fabric degradation. Skip the structural foundation and you’ve got embroidery on a failing garment.
Structure Over Show
Think of sashiko mending through the lens of materials engineering: stress concentration. When fabric tears, stress concentrates at the tear edges. Thread alone doesn’t redistribute that stress. Only a dense, properly tensioned grid of stitches moving perpendicular and parallel to the damage can spread force across a larger area.

Begin your mend by running horizontal passes of tight, close stitches perpendicular to the tear direction. Then layer vertical passes over them, creating a matrix. The pattern emerges from function, not from aesthetic preference. Your thread density matters more than thread color. Only after you’ve locked the damage into a supportive grid do you run the decorative outer stitches that people actually see.
The structural mend is invisible or semi-visible. It lives under the damage area. The decorative stitching sits on top of a foundation that already holds. This is why traditional sashiko patches on work jackets used indigo thread on indigo fabric, simple and redundant. The visibility was incidental. Strength was the mechanism that determined survival.
Sashiko Mending: The Structural Reinforcement Protocol
Where Damage Actually Concentrates
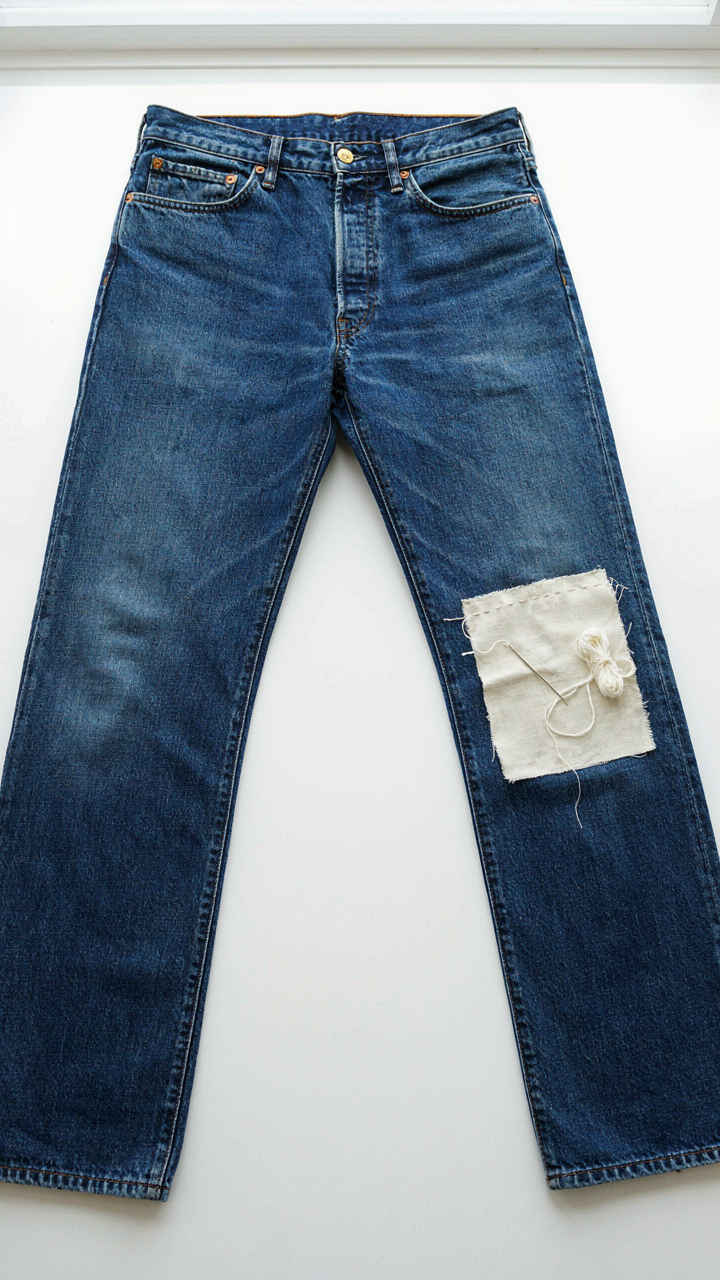
You want sashiko to look intentional, not desperate. That’s the real reason you’re reading this. But here’s what matters: sashiko works because it places thread density exactly where fabric fails first. Stress concentrates at edges of holes and along existing creases. Denim fails at the inside thigh seam and behind the knee. Jackets tear at elbow bends and pocket corners. You reinforce the perimeter before the damage spreads inward.
Think of stress concentration like military strategy: fortify the borders before the center collapses. Sashiko stitches form a perimeter defense around weak zones. The running stitch pattern isn’t decorative—it’s load distribution. Each pass of thread absorbs force across a wider area instead of letting it spike at one point. You identify stress points by looking at wear patterns, not guessing.
Preparing Fabric So Stitches Hold
Most guides skip this step. They tell you to just start stitching. That fails. Loose fibers migrate under tension, and stitches slip through damaged fabric. You need mechanical grip before needle touches cloth. For jeans, back weak areas with woven cotton patch fabric placed behind the hole. For jackets, use lightweight muslin or commercial stabilizer. Don’t use fusible interfacing—adhesive fails under repeated movement and washing.
Press the backing to the wrong side using hand-basting stitches spaced half an inch apart. This temporary attachment prevents shifting during sashiko work. The backing gives the needle something solid to push through. Once you complete the sashiko pattern, the top stitching locks the backing in place permanently. Remove basting threads only after the final row is complete.
Thread Selection: Beyond Color Matching

Why Tensile Strength Actually Matters
You want the patch to look intentional, not like a band-aid. The real problem is that weak thread fails before weak fabric does, so your repair unravels while the garment survives. Sashiko uses thread with higher tensile strength than standard sewing thread because the stitch absorbs repeated stress at load points. Jeans and jackets concentrate that stress where fabric flexes most: seams, edges, pocket corners. If your thread snaps first, the whole repair collapses and you’re back where you started.
Polyester thread outperforms cotton thread on denim and canvas because synthetic fibers stretch slightly before breaking. Cotton thread stays rigid, then fails suddenly. When fabric moves, polyester threads move with it. This is material science, not preference. Match thread strength to fabric weight: light cotton garments need standard polyester, heavy denim needs heavy-duty or upholstery-weight thread. Test your thread by pulling it hard before you sew. If it snaps easily in your hands, it will snap in the garment.
Fiber Properties And Why Your Choice Compounds
This is where most guides fall short. They say “use matching thread” and stop. Thread durability compounds over time, which means a weak thread choice creates exponential failure risk. Each wash cycle adds stress. After fifty washes, weak thread shows as fraying; strong thread shows as a solid patch. The fiber type determines how thread responds to detergent, heat, and abrasion during laundering.
Polyester resists fading and holds strength through repeated washing better than cotton. Silk thread looks beautiful but degrades faster under UV light and alkaline detergent. On jeans and jackets that get regular wear, polyester or nylon thread lasts longer. On heirloom pieces worn rarely, cotton or silk work if you prioritize aesthetics over durability. Before selecting thread, decide whether the garment gets weekly wear or monthly wear. That single decision determines which fiber type you buy and how long your repair actually holds.
The Geometry Of Strength: Sashiko Pattern For Durability

Grid Versus Organic Pattern Application
You want your repair to disappear, to look intentional rather than salvage work. That desire is the wrong starting point. The mechanism that determines durability isn’t aesthetics—it’s load distribution. A grid pattern spaces stress evenly across the fabric. Organic patterns follow fabric grain and existing wear, but they create stress concentration at pattern endpoints where thread density changes abruptly. Grids win for longevity on high-friction zones like jean thighs and jacket elbows.
Traditional sashiko from Japan used grids deliberately, not for beauty but because they understood tension mechanics without naming them. Geometric patterns like hemp leaf or interlocking diamonds distribute force uniformly. When you stitch in a grid on denim, you’re creating redundant load paths. If one thread fails, adjacent threads carry the load. Organic freestyle stitching looks more personal but leaves weak zones. Apply grids to stress points, organic patterns to patches where movement is minimal.
Strategic Stitch Direction For Longevity
The direction your needle travels determines how thread resists the primary tear vector on that garment. Denim fails vertically along the grain when knees bend or fabric bunches. Jacket sleeves tear horizontally from arm rotation and abduction. Running stitches parallel to the tear direction provides minimal resistance. Running them perpendicular creates a lattice that arrests fabric separation. This is basic material science: thread angle relative to stress direction governs failure resistance.
Vertical stitches on knee repairs do less work than horizontal ones. A crosshatch pattern with both directions is stronger than either alone, but if you only have one direction, choose the one opposing the primary stress axis. On jacket cuffs that fray horizontally, stitch vertically. On jean thighs that wear thin from friction and flexing, stitch both horizontally and vertically in a grid. Stitch direction determines whether your mend lasts one season or five. When you finish your pattern, overlap the final row by one inch back into the existing stitches to lock the thread ends rather than knotting them.
Needlework As Engineering: Sashiko Stitching On Jeans

The Leverage Point In Thread Tension
You want to believe sashiko works because it looks intentional, like you’re doing something real instead of just patching a hole. The actual mechanism comes from physics: mechanical advantage. In engineering terms, this is force multiplication through distance. Your needle and thread function as a lever system. The spacing between stitches, combined with thread tension, distributes load across multiple contact points instead of concentrating stress at one point where a standard repair fails.
Standard repairs fail because they pile all force onto a few threads in a tight cluster. Sashiko spaces stitches 6-8mm apart on denim, creating a grid where each stitch independently absorbs tension before transferring it to the next. This is why wider stitch spacing on heavy fabric outlasts dense stitching. The distance itself becomes the repair mechanism. Your thread doesn’t need to be stronger; the pattern makes it work harder across more surface area.
Material Reading For Actual Durability
Most sashiko advice treats denim as uniform fabric. It isn’t. Denim has directional grain from the weave. The warp (vertical threads) runs tighter than the weft (horizontal threads), meaning vertical repairs hold differently than horizontal ones. When you mend a hole on jeans, you’re not fighting generic “fabric.” You’re working against the specific tension direction of that weave.
Run your repair stitches perpendicular to the direction the tear wants to pull open. If the hole appears on the inner thigh where fabric flexes forward and back, run stitches vertically. If the rip runs along a seam where horizontal stress dominates, angle your grid to oppose that motion. The thread path determines how long the repair survives. Denim’s density also matters: 12-14 ounce fabric needs smaller stitches than 16+ ounce, because lighter weight tears more easily under the same stitch load.
Patch Placement: Boro Stitching Principles Applied
Matching Patch Size To Fabric Weight
You want the patch to look intentional, not like a mistake someone tried to hide. That’s the real reason this matters. Patch size must scale with fabric weight because thin fabric tears from stress concentration at patch edges, while heavy fabric can absorb patch seams without buckling.
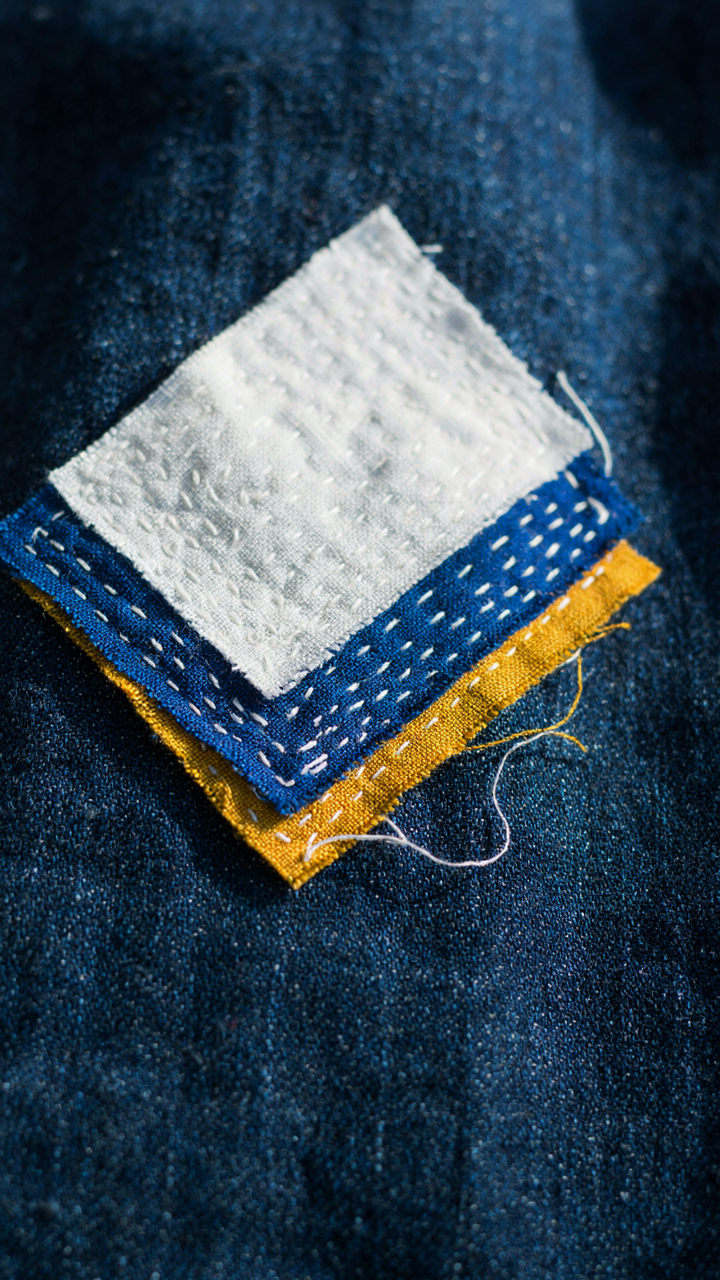
Denim and canvas handle larger patches because their weight distributes force across more fibers. A 3-by-4-inch patch works on 14-ounce denim. On lightweight jacket fabric under 8 ounces, drop to 2-by-3 inches maximum. The patch edges become stress points where two fabric stiffnesses meet. Oversizing the patch relative to the base fabric creates a hinge effect instead of reinforcement.
Layering Creates Load Paths
Think of this in engineering terms: load distribution. In structural design, you reduce peak stress by spreading force across more surface area. Sashiko layering does the same thing. Multiple fabric layers under your patch absorb impact across the entire stack instead of concentrating it at one point.
Start with one base layer directly over the damage. Add a second layer slightly larger, offset by a quarter inch. This creates a stepped stress transition. The stitching pattern then locks all layers together as a unit. This method comes from boro construction, where Japanese garment makers stacked scraps to repair work clothes that faced genuine wear. The layered approach keeps patches from peeling or cracking at their perimeter after months of movement and washing.
Beyond The Basics: Advanced Sashiko Embroidery
Fortifying Wear Points Before Failure
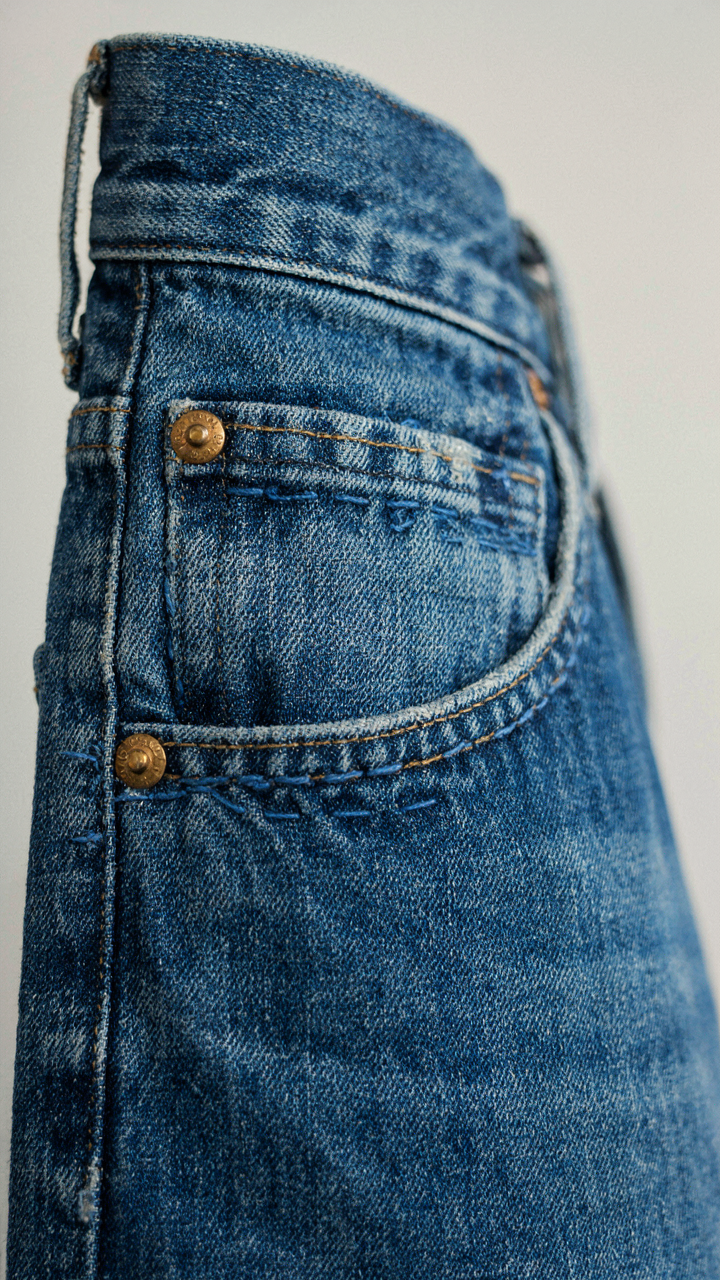
You want people to notice you fixed something without making it look accidental. Here’s what actually happens: fabric fails where stress concentrates, not where it’s thin. Stress follows load paths, a concept borrowed from structural engineering. On jeans, the inside corner of front pockets and the crotch seam carry cumulative force. Sashiko reinforcement works because the running stitch redistributes that load across a wider thread network. You’re not patching a hole. You’re building capacity before collapse.
Start reinforcement at the stress origin, not downstream. Pocket corners need a grid pattern running both parallel and perpendicular to seams. The crotch area demands a diagonal lattice that crosses the natural split line. Thread choice matters here: use a weight that matches or slightly exceeds the original seam thread. Run your needle through existing seam loops where possible to anchor the new structure into the garment’s frame. This locks your preventive work into the garment’s existing tensile system.
Design Integration, Not Afterthought Repair
Most people treat sashiko as damage control. That’s wrong. The real move is designing garments where visible mending becomes the aesthetic from day one. Japanese workwear designers understood this in the 1970s, and avant-garde brands like Boro have reframed it as intentional surface language. Sashiko patterns on unworn fabric read as deliberate geometry, not patches hiding failure. Your jacket doesn’t need a hole to earn visible mending.
The integration works by placing sashiko grids on high-impact zones before wear occurs, then letting the garment age into the design. Jacket elbows, shoulder seams, and trouser thighs accept patterned reinforcement without looking reactive. Use thread colors that complement your fabric’s dye, not contrast against it. This approach shifts the garment’s visual narrative from “broken and fixed” to “built to last and designed to show it.” Install reinforcement in your construction plan, not your crisis response.
The Longevity Equation: Sashiko Mending Vs. Disposable Fashion

The Real Math Behind Repair
You want permission to spend time on this instead of buying new. Here’s the mechanism: fast fashion operates on planned obsolescence, where garments fail within 12-18 months by design. Sashiko mending inverts that timeline. A pair of jeans with a blowout costs $60-120 to replace. Mending that same pair costs $3-8 in thread and takes 90 minutes. Economics calls this the “time value of money,” but sashiko operates on a different principle: material value compounds with each repair. Your jacket doesn’t depreciate. It becomes more durable with reinforcement.
The decision point isn’t whether you can afford repair. It’s whether you’ll accept friction. Buying new requires zero decision-making. Mending requires you to sit, thread a needle, and work. Most people won’t do this. That’s not laziness. It’s that the system rewards speed over durability. Sashiko breaks that reward structure by making visible repair cheaper and faster than replacement once you’ve learned the pattern.
Wear Cycles And Material Truth
Throwing out clothing creates waste. Extending wear creates friction elsewhere. A denim jacket worn for five years instead of one generates different problems: it requires maintenance, it requires storage, it requires you to accept visible repair. The environmental case seems obvious until you factor in the actual mechanism. Garment production consumes water, chemicals, and energy. Wearing an item five times longer doesn’t just reduce waste. It spreads that production footprint across five times more use, making each wearing session more efficient.
Visible mending with sashiko forces honesty about material. That tear isn’t damage that happened to you. It’s evidence of use. A mended jacket tells a story that a new one can’t. Prolonged wear changes your relationship to the object. You notice fabric differently. You understand its weaknesses. This knowledge becomes the input for better mending. When you repair the same area twice, you apply a different stitch, a different approach. The garment teaches you through its failures.
Your Toolkit: Essential Gear For Serious Sashiko
Needles, Thimbles, And Thread Selection
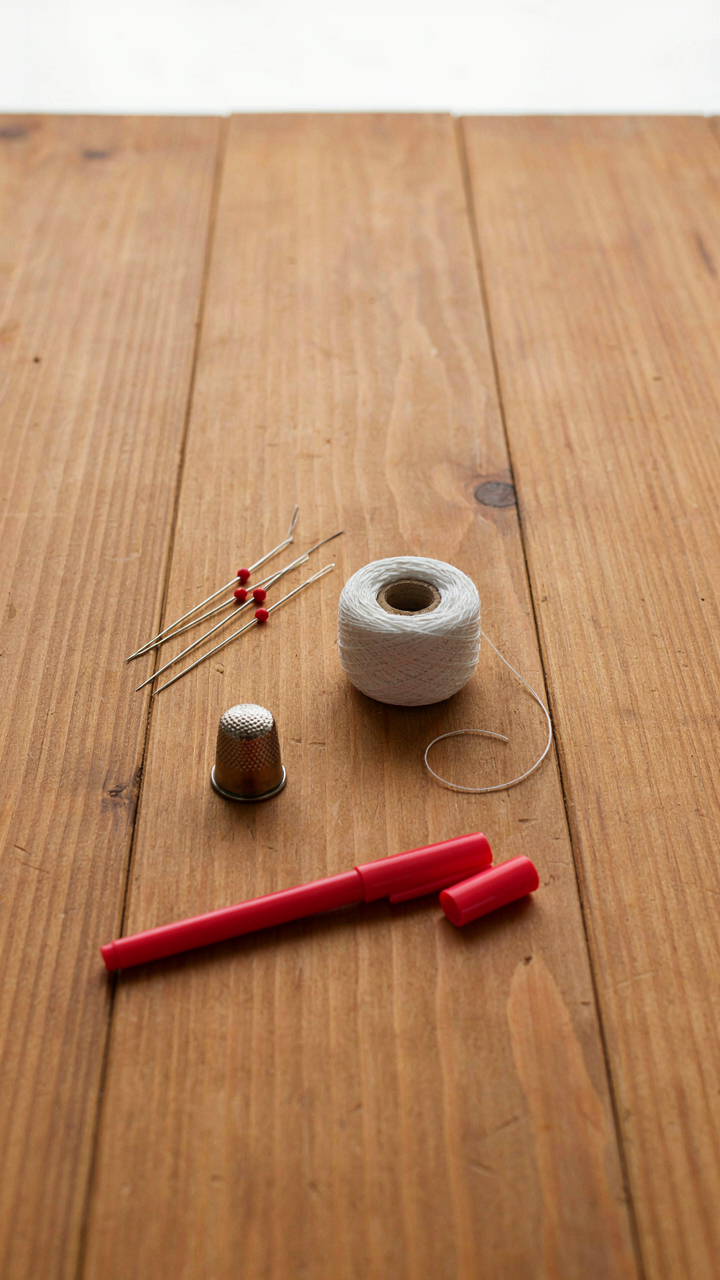
You want the right tools because you’re afraid cheap equipment will wreck your work and waste your time. The mechanism is simple: needle diameter controls stitch depth and visibility, thimble fit prevents hand fatigue that kills precision, and thread quality determines whether your repair lasts five years or five months.
- Sashiko needles (size 5 to 8): Longer and thicker than standard sewing needles, designed to pierce dense fabric with minimal bending. Length ranges from 1.5 to 2 inches for comfortable hand positioning.
- Steel thimbles (ring or dome style): Protects the finger pushing the needle through multiple layers. Ring thimbles grip the middle finger; dome thimbles sit on the fingertip. Choose based on comfort and hand size.
- Single-strand cotton thread (size 12 or 15): Traditional choice for sashiko. Twisted structure resists fraying and shows stitch pattern clearly. Buy from specialty suppliers rather than mass retailers.
- Perle cotton (size 5 or 8): Alternative to single-strand. Creates bolder visual lines on denim and canvas. Thicker than traditional thread, so use one strand instead of two.
- Indigo-dyed thread: Matches denim color and fades predictably with wear. Practical for jeans repair because color shifts align with fabric aging rather than standing out.
Thread matters more than you think because it carries the entire visual load of your repair. A cheap thread shreds under tension, unravels in the wash, and makes even precise stitching look sloppy. Buy thread built for sashiko work, not generic cotton. Your hand will thank you after hour two of stitching.
Marking Tools And Fabric Securing Methods
Forget the advice that says you can mark sashiko patterns freehand and just “go with the flow.” That’s how beginners create crooked lines and abandon projects halfway through. You need a way to hold fabric still and mark straight paths before you touch needle to cloth.
Fabric clamps or a basting frame keep denim taut during stitching, which eliminates the wobble that ruins geometric patterns. Mark patterns with a water-soluble pen, chalk, or Japanese stencil before clamping. The stencil method is fastest because you lay it over fabric, trace the lines with chalk, and remove it. Denim’s texture holds chalk marks without smudging, and marks vanish after the first wash. On jackets with smoother weaves, water-soluble pen outperforms chalk because it won’t ghost into surrounding stitches.
Maintenance: Ensuring Your Sashiko Jean Repair Lasts

How To Wash Without Unraveling The Work
You want your repair to look intentional forever, not like it cost you twenty bucks and fell apart in three months. Here’s the mechanism: sashiko thread sits on the fabric surface. Water pressure and agitation don’t shred it, but heat cycling and chlorine do. The fibers weaken when exposed to repeated thermal stress, especially polyester blends that can’t handle dryer temperatures.
Wash sashiko repairs in cold water, gentle cycle, inside out. Air dry completely. Hot water accelerates fiber degradation. Dryers are not negotiable—the heat breaks down thread elasticity. Never bleach repaired areas. If you’re doing this right, the repair becomes a design feature that outlasts the original fabric. That’s the only way this makes sense economically.
Catching Failure Before It Spreads
Most people wait until a repair fails completely before touching it again. Wrong timing. Think like structural engineering: a crack propagates along the path of least resistance. A loose sashiko stitch creates a stress concentration point where adjacent stitches fail faster. Monthly inspection catches this before it cascades.
Check your repairs every month. Look for loose stitches, fraying thread ends, and separation at repair edges. Re-anchor any stitch that moves when pulled. Tighten loose knots on the back side with fresh thread, same color. Reinforce edges before they unravel. This takes five minutes and adds years. Sashiko repairs don’t require replacement—they require maintenance like anything built to last.
The Real Obstacle Isn’t The Needle; It’s Your Impulse To Perform Rather Than To Fortify

Most people want sashiko to look perfect. They want Instagram-worthy stitches. That’s the trap. Real sashiko mending lives in function, not aesthetics. Your jeans don’t care if your lines waver. They care if the hole stops growing. Stop waiting for your skills to feel polished. Grab a needle today, pick a torn pocket or fraying cuff, and stitch it. Imperfect repair beats perfect procrastination every single time.