

The Myth Of Permanent Damage: Why “Ripped” Is A Lie

What You’re Really Afraid Of Losing
You think a ripped seam means the garment is done. It doesn’t. What you’re actually scared of is the cost of replacement and the time investment to fix it, so your brain shortcuts to “damaged goods.” Here’s the mechanism: a seam is just thread following a line. When it fails, the fabric underneath stays intact. The thread broke or pulled free from the needle holes, but those holes don’t expand or weaken the material. You’re not dealing with structural failure of the fabric itself, only the temporary connection holding it together.
Most people misdiagnose a ripped seam as catastrophic damage because they conflate the seam with the garment’s integrity. They don’t. A shirt with a blown-out armpit seam has a perfectly fine cotton or polyester body. The thread simply lost tension or snagged. Fabric doesn’t deteriorate because a seam split. It deteriorates from wear, UV exposure, washing friction, or chemical damage over time. A rip just means the thread gave up before the cloth did. Understanding this distinction is the first step to treating this as a five-minute repair instead of a tragedy.
How Stress Points Signal Before They Snap

Engineers call this stress concentration. Certain spots on any garment experience repeated tension, and thread accumulates fatigue before the fibers actually separate. Armpits, crotch seams, and pocket corners see the most load because they bend, stretch, and bear your body’s movement. The thread in these zones experiences what’s called cyclic loading, the same principle that makes bridges fail not from one massive force but from millions of small repeated stresses. Your seam doesn’t rip suddenly. It frays, loosens, and warns you first.
You’ve seen this warning sign and ignored it. Small loops of thread poking out where the seam runs, slight puckering or waviness in the line, or visible gaps where the stitches have separated from the fabric edge. These are not surprises. They’re notifications that tension has been building. Catching a seam at this stage takes thirty seconds. Waiting until it splits completely wastes time because now you have a gaping hole instead of a tight line to re-stitch. The protocol is simple: when you see thread loosening anywhere, re-stitch that section immediately before the entire seam unravels.

The Minimalist Mender’s Toolkit: Essential, Not Excessive

What You Actually Need To Buy
You’re here because you want to look competent without spending money on things you’ll forget you own. The real mechanism is constraint: fewer tools force better technique. A needle, thread, and scissors are enough. Most people sabotage themselves by treating this like a hobby that requires a starter kit. It doesn’t. You need three objects. Everything else is distraction masquerading as preparation.
Match your needle size to fabric weight. A thin needle bends on heavy denim; a thick needle tears silk. Thread color should match the garment, not the rip. Scissors cut cleanly; torn thread ends fray and slip. Keep these three in a drawer. When the seam splits, you already know where to find them. That’s the entire system.
Why Specialty Gadgets Waste Your Time
Common advice tells you to buy seam rippers, specialized thread, and needle threaders. This is wrong. A seam ripper is a curved blade designed to cut stitches without damaging fabric. You don’t need it for hand repair. Your needle already removes old stitches faster than fumbling with a gadget. Needle threaders promise convenience but train your hands to be dependent on a crutch you won’t have in an emergency.
The mechanism here borrows from tool design philosophy: a tool solves one problem or it creates cognitive overhead. Your needle and thread solve the problem directly. Threading your needle by hand takes six seconds once you’ve done it ten times. Specialty tools create inventory and decision fatigue. You’ll spend more time finding the seam ripper than it takes to stitch the seam closed. Keep your toolkit invisible.
The Kinetic Repair Protocol: Beyond The Basic Stitch
How Fabric Fails Under Real Stress
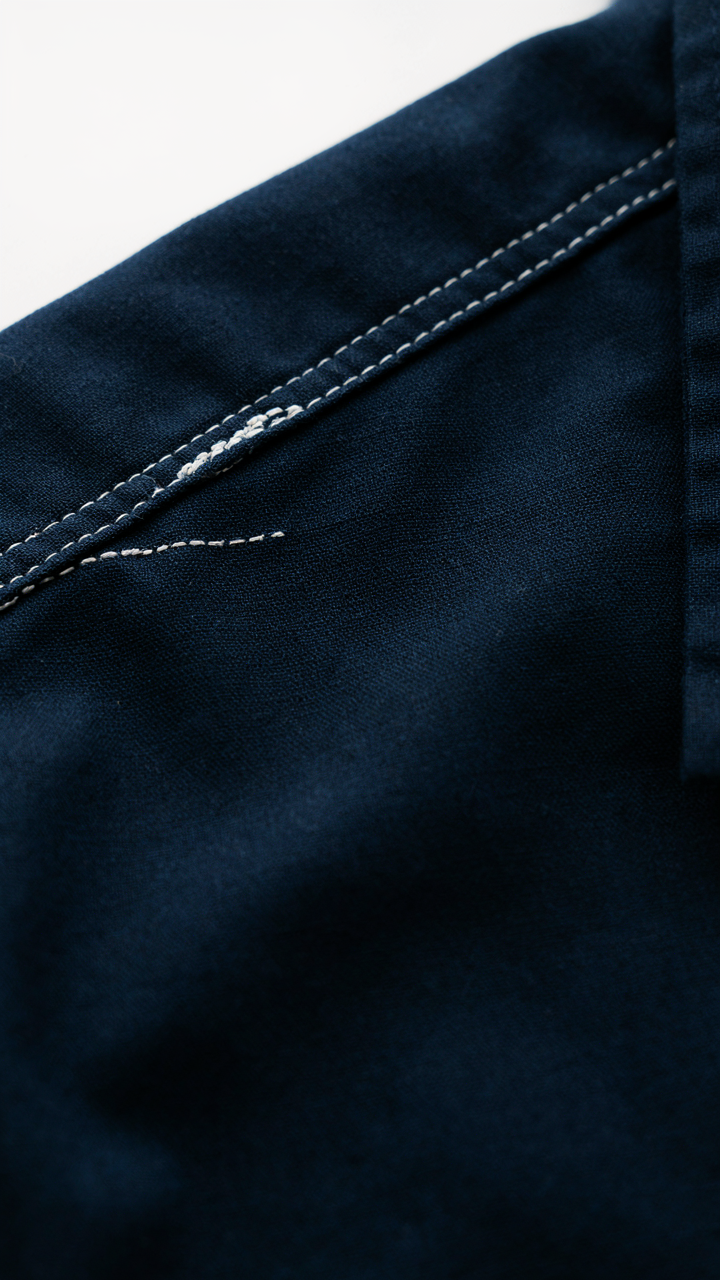
You want this repair to hold because you’re tired of buying replacements and pretending it doesn’t bother you. The mechanism is simple: fabric tears along the line of least resistance, which is the seam itself. Seams fail because threads break under repeated tension, not because they were stitched wrong initially. Material science calls this “stress concentration” – the seam becomes a weak point where force accumulates instead of distributing across the material. Understanding this changes everything about how you approach the fix.
Most people just re-stitch the original seam path and wonder why it rips again in two weeks. You’re repeating the same failure point. The real solution is distributing that stress across a wider area using a reinforcement zone. This means your new stitches must create a load path that diverts force away from the original tear. The thread itself matters less than the geometry of your repair. Synthetic thread holds better under dynamic movement than cotton because it has more elasticity to absorb shock before snapping.
Tension And Reinforcement Architecture
Tight stitching is the most dangerous mistake you can make, and most guides tell you to pull hard. Excessive tension concentrates all the stress into individual thread segments, making them snap faster under movement. You need tension that’s firm enough to hold the fabric layers together without choking the material. The balance point is when you can slide a fingernail under the thread with slight resistance – that’s your target pressure.
Reinforcement works through layering, not through thread thickness. Take a secondary pass parallel to your main repair seam, sitting about a quarter-inch away on the stress side. This creates a mechanical brace that distributes load across both thread lines. After the main repair closes, make this second pass using the same thread color and tension standard. The dual-line approach handles dynamic stress three times better than a single reinforced stitch because it spreads the load into two separate failure points instead of one.
How To Sew A Ripped Seam By Hand: Precision Over Speed

The Whipstitch Builds Strength Where It Matters
You want this done fast so you can move on with your life. The real mechanism at work here is tension distribution, borrowed from structural engineering. A whipstitch spreads load across multiple thread anchors instead of concentrating it at one breaking point. Most people use a running stitch on seams, which creates a straight line of failure points. The whipstitch wraps thread around the fabric edge, locking fibers in place rather than just piercing through them.
Thread the needle and knot the end. Start from inside the seam where the rip begins. Bring the needle up through one folded edge, then insert it directly across into the opposite fold. Move the needle forward a quarter inch inside the fold before bringing it back out. Each stitch should angle slightly, catching fabric fibers rather than just pulling material together. This creates a seal, not just a joint.
Stop Using The Running Stitch On Seams
Everyone learns the running stitch first, so everyone uses it wrong on repairs. It fails because it creates a thin line of tension that tears predictably along its length. Hand-sewn seam repairs need the backstitch or whipstitch to survive real wear. The running stitch works for simple mending on non-stress areas, but not where fabric experiences pull or friction.
Position your needle at the start of the rip, inside the seam allowance. Push the needle through both fabric layers, then pull the thread snug but not tight. Go back one stitch length, insert the needle, and bring it out two stitch lengths ahead. This creates overlapping thread paths that reinforce each other. Keep stitches small, around one-eighth inch, and maintain consistent tension throughout the entire repair.
How To Sew A Rip In A Shirt: The Fabric Anatomy Approach

Understand Grain Direction Before You Stitch
You’re reading this because you don’t want to waste money on a replacement shirt that costs more than your hourly rate. The real mechanism at work is fabric grain, which determines how your thread will hold under stress. Textiles operate on a directional system: warp threads run lengthwise, weft threads run crosswise, and bias runs diagonal at 45 degrees. A rip that runs parallel to the grain behaves differently under tension than one that cuts across it. Thread on grain stays put. Thread against grain tears out.
Assess the direction your tear travels before you needle it. If the rip runs along the grain, your stitch will hold with minimal reinforcement. If it cuts across grain or at an angle, you need a different approach: backstitch instead of running stitch, and use more passes. Cotton, polyester blends, and natural fibers all respect grain the same way. Silk is the exception—it frays faster but still follows this rule. Check grain by pulling gently on the fabric in different directions; grain stretches less than bias does.
Match Thread Weight To Fabric Weight
Common advice says use the same color thread and call it done. That’s incomplete. Thread-to-fabric matching has nothing to do with color and everything to do with load capacity. A thin thread on heavy denim will snap under the first wash. Heavy thread on silk will pucker the fabric and create a visible scar. The mechanism is simple: thread diameter must distribute stress evenly across the weave without exceeding the breaking point of individual fibers.
Hold your thread next to the fabric weave and compare. Cotton thread on cotton fabric creates minimal visibility because fiber composition matches. Polyester thread on synthetic blends works the same way—the materials have compatible elasticity. If you only have one thread color available, pick the weight first, color second. A rip sealed with wrong-weight thread fails silently; you discover it three wears later. Sew the rip with backstitch using thread matched to fabric weight, making passes until you feel resistance in the fabric itself.
Seam Ripping Hacks: Deconstruction For Superior Reconstruction
Remove Stitches Without Damaging Fabric
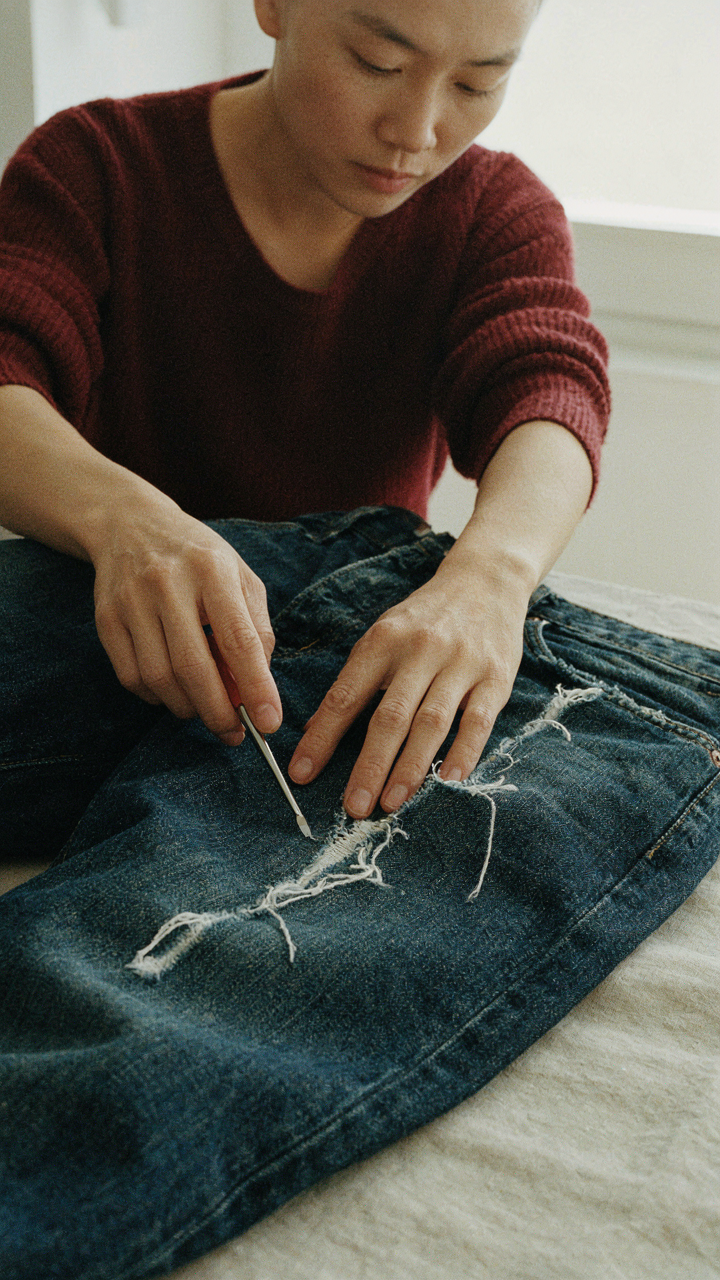
You want to avoid the embarrassment of turning a small rip into a visible patch job. Here’s the mechanism: controlled seam removal depends on separating thread from fiber without creating new damage. Think of this like archaeology—you’re excavating the old seam, not demolishing the site.
A seam ripper works by sliding under individual stitches and cutting them from underneath, where the thread sits proud of the fabric. The blade never touches the weave itself if you angle it correctly. Place the hook under the stitch, rotate it 45 degrees toward the seam, and apply light downward pressure. The thread breaks, not the fibers. Work stitch by stitch rather than yanking the whole line at once.
Know When The Seam Ripper Becomes A Liability
The common advice says always use a seam ripper. That’s incomplete. A seam ripper creates problems on delicate fabrics, tightly-woven synthetics, and vintage garments where fibers have already weakened. On these materials, a single-blade craft knife often works better because you control pressure more precisely and avoid the hook catching loose fibers.
The real decision rule: use a seam ripper on natural weaves (cotton, linen, wool) where you’re attacking multiple stitches. Use a blade on synthetic blends, dense knits, or when only one or two stitches failed. Test your tool on a hidden area first—inside a seam allowance or hem. This tells you whether your fabric will cooperate before you touch the visible repair zone.
Best Seam Ripper For Stretch Fabric: A Surgical Approach

Why Stretch Demands Different Tools
You’re worried about making it worse. That fear is justified. Stretch fabric behaves like a biological system under tension—the fibers stay in a state of constant pull, and standard ripper technique creates lateral stress that elastane fibers can’t absorb. A dull blade or aggressive sawing motion doesn’t cut the thread; it crushes the yarn and weakens the surrounding weave. The mechanism is simple: stretch fabric has less structural reserve than woven cotton, so your tool choice directly determines whether you repair or compound the damage.
A seam ripper with a rounded tip and thin, sharp blade is non-negotiable here. The rounded tip prevents you from puncturing the fabric base when you slide under the thread. Most people use whatever ripper came in their kit and wonder why they’ve torn holes. The difference between a $1 ripper and a $6 one is blade geometry and material hardness. You need a tool that cuts rather than shears, and that requires a blade designed for precision, not volume work.
Controlling Thread Tension During Removal
Stretch fabric teaches you that thread tension is physics, not preference. When you remove stitches from spandex blends or jersey knit, the surrounding threads want to contract and bunch. The common advice to “gently work the seam open” misses the actual mechanism: you’re managing radial force distribution across elastic fibers. Work perpendicular to the seam line, not parallel. This distributes stress evenly rather than creating stress concentration points that snap the surrounding yarns.
Cut every third or fourth stitch, then gently pull the thread away from the fabric at a forty-five-degree angle. This prevents the blade from catching loose fibers as you progress. Once you’ve removed half the stitches, the seam will separate enough that you can slide the ripper under the remaining threads without risk. Do not yank the thread out. Thread removal pressure should take maybe two or three seconds per stitch, no more.
Mending Clothes: From Reactive Fix To Proactive Fortification
Where Seams Fail First
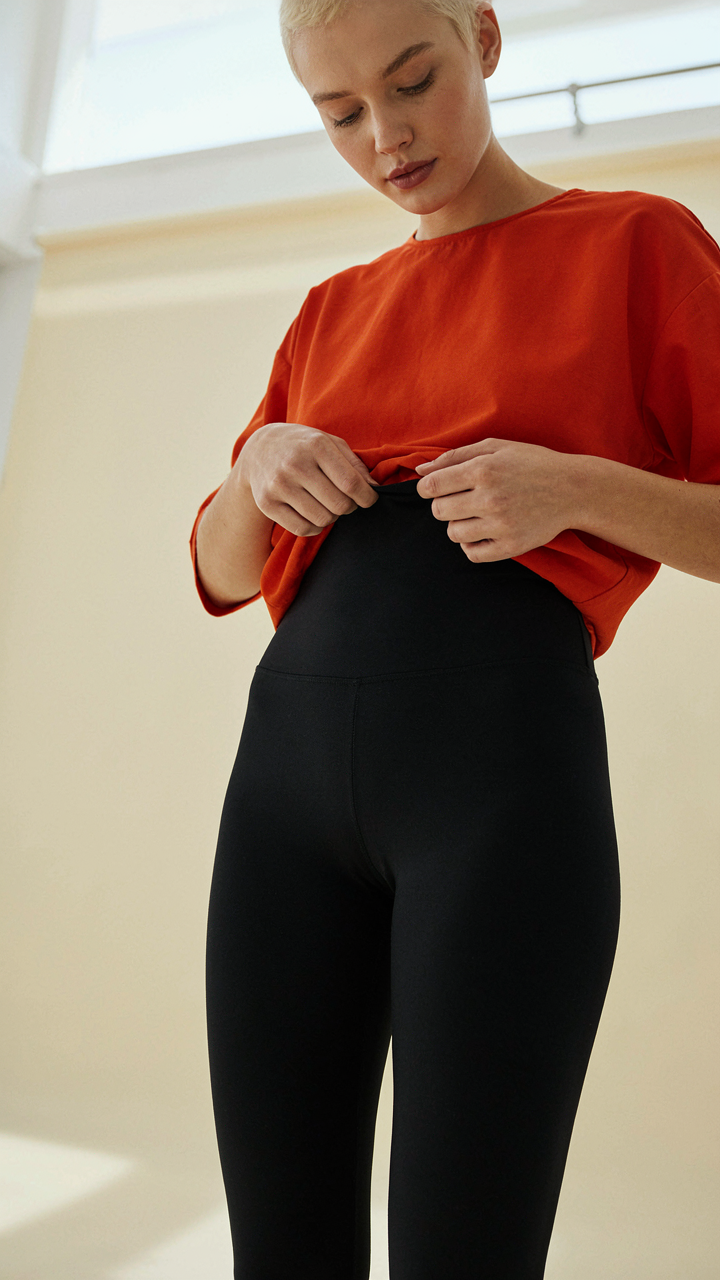
You’re reading this because you don’t want to replace clothes you actually like, and that’s rational. Seams don’t fail randomly—they fail where stress concentrates. In engineering terms, stress concentration creates failure points. Your seams work the same way: certain zones take repeated tension while others stay dormant. Armholes, crotch seams, and underarm stitching fail first because they flex during the movements you repeat most. The fabric around them weakens gradually before the thread snaps.
The standard advice says inspect your clothes occasionally. That’s vague enough to be worthless. Instead, watch for thread discoloration and loose fibers in high-movement zones. When you see fibers starting to fray or the thread darkening from friction, that’s your signal—the seam is about to fail. You have maybe two wears left before the rip spreads. Reinforce it now, before you need an emergency fix.
Building Redundancy Into Load Zones
Every seam carries a load rating based on thread count and stitch density. Doubling the stitch density doubles the load it handles. This is why tailors run a second row of stitches parallel to the original seam on premium garments—they’re adding redundancy where failure costs the most. Your job is identifying which seams earn that treatment based on how you actually use the garment.
For a daily-wear item, reinforce any seam that flexes more than twice per wear cycle. Run a second stitch line one-eighth inch inside the original seam using matching thread. Keep your tension consistent with your first pass. This takes five minutes and extends the seam lifespan by years. The second row catches the load if the first begins separating, giving you time to notice before visible damage occurs.
How To Sew Ripped Fabric: Beyond The Seam Line
Patching Techniques For Non Seam Tears
You care about this because a visible patch looks like failure, and you’re wondering if there’s a way to make it disappear. There isn’t, but you can redirect attention through material strategy. Think of patching like load distribution in engineering: you’re not trying to hide the damage, you’re spreading the stress across a wider surface so the repair point never bears the full weight again.
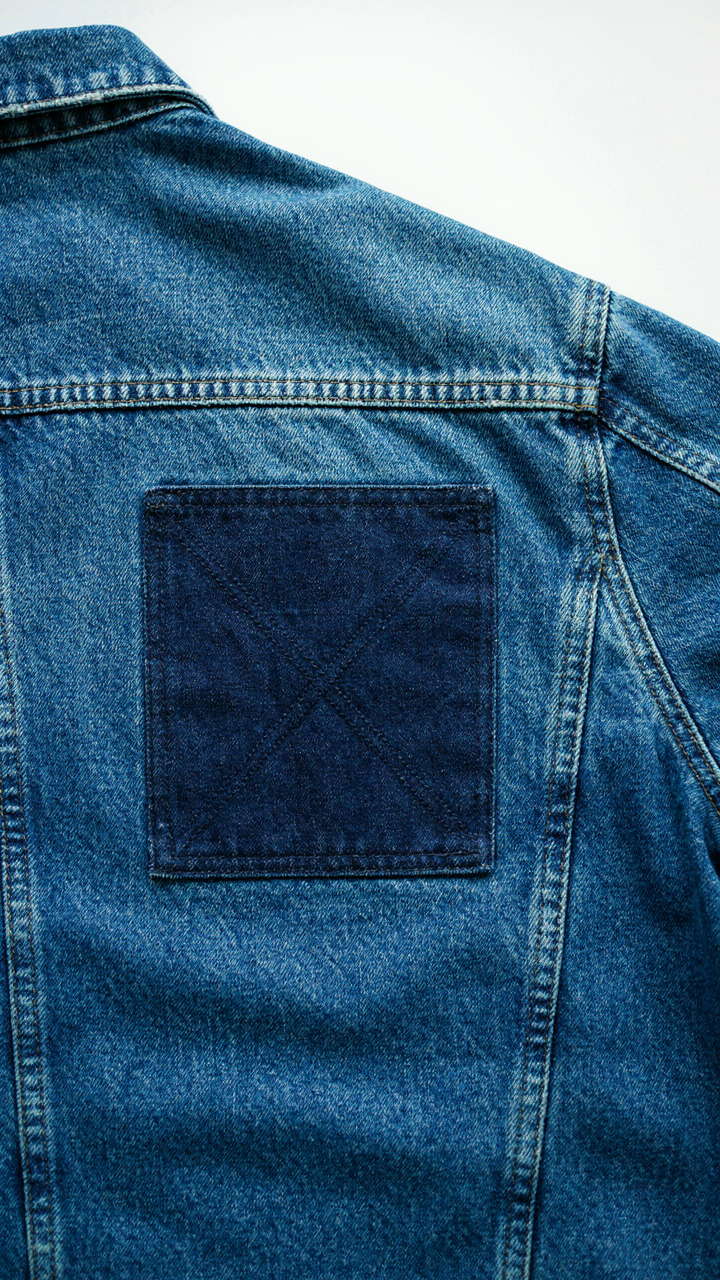
The common advice says use fabric glue or iron-on patches. Both fail within weeks because adhesives don’t account for fabric movement. Thread creates a mechanical bond that moves with the material. Choose patch fabric slightly thicker than the original garment, cut it at least two inches beyond the tear in all directions, and sew it down using a box stitch pattern with an X through the middle. This locks the patch in place permanently.
- Patch placement matters: Position the patch on the reverse side first. If visibility is unavoidable, place it on a seam line or an area that naturally creases during wear.
- Fabric matching is secondary: A contrasting patch sewn tight outlasts a matched patch sewn loose. Function beats aesthetics every time in durability.
- Box stitch with center X: Sew a rectangle around the patch perimeter, then stitch an X from corner to corner. This creates four anchor points instead of one weak line.
- Tear size determines patch size: Tears under one inch need a 3 inch patch minimum. Larger tears need proportionally larger patches or multiple smaller patches placed adjacent to each other.
- Pre fray prevention: Cut patch edges at a 45 degree angle before sewing. This reduces the likelihood of the patch edges lifting after repeated washing.
The repair holds because you’ve created redundancy in the thread network. Single line stitching transfers all tension to one seam. A box stitch distributes that load across four edges. The X through the middle prevents the patch from peeling at the corners, which is where 90 percent of patch failures actually start.
Invisible Mending Strategies For Aesthetic Repairs
Invisible mending works only on specific fabric types and tear angles. Most people attempt it on the wrong materials and then assume the technique doesn’t work. It works perfectly on woven fabrics with a tight weave and minimal stretch. It fails on knits, loose weaves, and anything with nap or direction.
The mechanism is simple: you’re using existing fibers as thread, not introducing new ones. Slide your needle between the fabric layers along the tear line, picking up existing fibers on both sides of the gap, then pull the thread tight enough to close the gap without puckering. This works because you’re not creating a new seam, you’re sliding the existing weave back together. The process takes longer than patching because precision matters. One loose stitch and the repair becomes visible. You match the thread color to the fabric, use a size 8 or 9 needle, and work in segments of half an inch. After every inch of repair, you stop and test the tension by gently pulling the fabric. If it puckers, you’ve pulled too tight. If it gapes, you’ve left too much slack. The sweet spot is when the gap closes completely and the fabric lies flat.
The Lifespan Extension Principle: Your Garments Are Investments

Stop Treating Clothes Like Consumables
You’re scared of wasting money on things that break. The real mechanism here is this: most people operate under a consumption model borrowed from economics, where cost per use drops as durability increases. A ten-dollar shirt worn ten times costs one dollar per wear. That same shirt, repaired once, extends to thirty wears and drops to thirty-three cents per use. The math is automatic. Fixing a seam doesn’t cost more than replacing the garment—it costs less, every time.
The disposable mindset isn’t about logic. It’s about friction. Buying new requires one decision. Repairing requires learning, finding materials, and executing. Most people choose the easier path. But that choice has a compounding cost. A wardrobe maintained through repair lasts three to five times longer than one left to fail. The shift from consumer to asset manager starts the moment you decide a torn seam is a fixable problem, not an endpoint.
The True Value Sits Beyond The Price Tag
Quality garments hold value through use, not through sitting unused. A well-made shirt from a quality manufacturer—one with reinforced stress points and tight weaving—survives multiple repairs because the base construction can handle the strain. Cheap construction fails in the same spot twice because the root problem wasn’t the seam; it was the fabric or the initial stitch tension. This distinction matters. You’re not extending the life of a low-quality piece through repair alone. You’re compounding the value of something built to last.
Repair literacy changes your purchasing decisions too. Once you understand that a ripped seam takes fifteen minutes to fix, you stop seeing wear as failure. You see it as evidence of use, which is evidence of value. The garment earned its place in your life. Maintaining it through basic hand repair becomes the standard maintenance protocol, like brushing teeth or changing oil. That’s when a wardrobe stops being a collection of temporary items and starts being an actual asset.
The Illusion Of Irreparable Damage Is Your Only True Obstacle

Most people throw away clothes the moment something breaks. They’ve decided the damage wins. But a ripped seam isn’t a death sentence. It’s a five-minute problem you solve with a needle and thread. The real damage happens in your head when you accept the lie that things can’t be fixed. Pick up that torn shirt today. Thread a needle. Make three passes through that seam. You’ll learn that damage and defeat are not the same thing.