

The Non Pose Protocol: Why Stiff Is Static, Fluid Is Power

Movement Beats Stillness
You want the photo to make you look effortless because stillness reads as trying. The mechanism here comes from cinematography: a static frame feels posed, but motion within that frame feels real. Your brain registers movement as authenticity even when the camera is frozen mid-action. Rigid posture telegraphs self-consciousness. Fluid positioning telegraphs confidence because confidence doesn’t announce itself.
When you’re moving through a pose instead of holding it, your body finds micro-angles that work. Your shoulders naturally drop. Your neck angle shifts. Your weight distributes in ways that no amount of instruction can replicate. The outfit reveals itself better because the fabric moves with you, not against you. Capture yourself in transition between positions, not locked into one.
The Moment Between Moments

The real power in outfit photography isn’t the pose itself, it’s what happens right before and after you stop moving. You’ve been taught to “find your angle” and “hold it,” but that advice misses the shot. The best frame often lands when you’re shifting weight, adjusting fabric, or turning your head. These moments contain natural proportion and authentic body language.
Set your camera to burst mode or shoot video, then pull stills. This removes the pressure of nailing one perfect frame. You’ll find that the transitions between poses contain more visual interest than the poses themselves. Your expression stays genuine. Your posture stays relaxed. The outfit reads as something you’re wearing, not something you’re displaying.

Light As Your Leverage: Mastering Natural Illumination
Find Your Home’s Light Sources
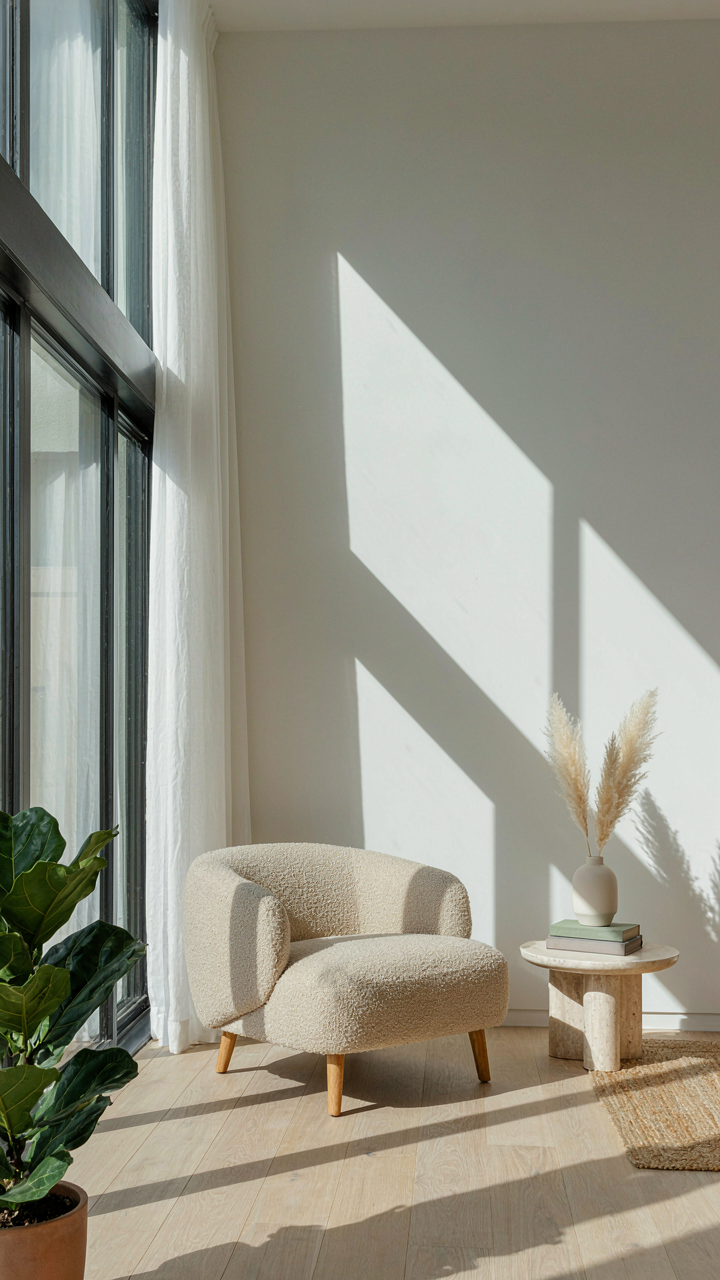
You want your photos to look effortless because effortlessness reads as wealth and competence. The real mechanism is this: light is contrast, and contrast is information. Your camera reads light distribution, not the outfit itself. Most people shoot wherever they stand. Stop. Map your home’s light patterns first. North-facing windows give flat, consistent light. South and west windows create directional light with shadows that add dimension. East windows deliver sharp morning light. The time of day matters more than the room.
Scout your space at different times. A window that looks useless at noon becomes useful at 4 PM. Position yourself perpendicular to the light source, not facing it directly. This creates a side-lit effect that separates you from the background and reveals fabric texture. The goal is asymmetrical illumination: one side brighter, one side slightly darker. This is how photography builds depth without equipment. Your phone’s camera sensor performs better when light hits you at an angle rather than flat-on.
Angle Your Body To Create Depth
Facing the camera straight-on while standing flat to a wall is the amateur default. Reject it. Depth comes from layering planes in space, borrowed from photography’s concept of depth of field. Position yourself at a 45-degree angle to your light source, not your camera. This means your body occupies multiple planes: shoulder closer, hip further, leg furthest. The camera catches those distance differences and translates them into visual interest instead of flatness.
Turn your shoulders toward the light. This exposes more fabric surface and creates shadow lines that reveal garment structure. If you’re backlit or sidelit, the edge of your body catches light and separates you from the background naturally. Avoid standing parallel to walls. Move at least three feet away from any background. The space between you and what’s behind you matters more than what’s behind you. This distance lets light hit both you and the background differently, which your camera reads as intentional composition rather than snapshot.
The Rule Of Thirds Remix: Deconstructing Composition For Impactful Full Body Photos

Off Center Placement Breaks Visual Monotony
You want the photo to feel intentional, not like you’re standing in the middle of your bedroom waiting for something to happen. That’s the real fear underneath caring about composition. Borrowed from painting and film, the rule of thirds creates “tension zones”—the four points where grid lines intersect become natural focal points. Position your body along these lines instead of dead center. Your shoulders, hips, or the space your outfit occupies lands where the viewer’s eye naturally travels. This breaks the static symmetry that reads as accident rather than design.
When you stand center frame, the camera sees equal space on both sides. Your outfit flattens. The composition says nothing. Off-center placement forces the viewer to work slightly harder to process the image, which registers as intentionality. Step left or right so your body occupies one of the thirds. Your head, torso, or legs align with a vertical grid line. This single shift transforms a snapshot into a composed photograph. The outfit becomes the subject, not just an object filling space.
Layering Foreground And Background For Depth
Most outfit photos fail because they exist in a void. A blank wall behind you and nothing in front creates the visual depth of a passport photo. Use environmental elements to build narrative layers. A bookshelf, a plant, a window, or furniture in the background adds context without demanding attention. Position yourself so foreground objects—a lamp, a chair back, part of a doorframe—create soft blur or partial obstruction in the lower third of the frame. This foreground element tells the camera where to focus: on you.
The mechanism is atmospheric perspective. Background elements read smaller and less detailed. Foreground elements read larger and close. Your outfit sits in the middle, gaining dimension through contrast. If your background is flat, add a single foreground object slightly out of focus. Shoot from a position where a piece of furniture or an interior detail naturally sits between the camera and you. This creates the illusion of space where none existed. The outfit photo shifts from two-dimensional product shot to three-dimensional moment.
Beyond The Mirror Selfie: Angles That Lie (And Tell The Truth)

The Camera Height That Controls Your Body
You want to look taller, leaner, more authoritative. That’s the real reason you care about camera angle, and it works because physics doesn’t negotiate. Borrowed from optics: foreshortening is the compression of depth perception based on your viewpoint angle. When you shoot from below eye level, you’re increasing the distance between camera and your lower body while decreasing distance to your head. Your proportions distort. Your frame expands upward. Your legs shrink relative to your torso. This isn’t magic. It’s geometry applied to two dimensions.
Low angles flatten your vertical axis and expand your horizontal presence. High angles do the opposite: they compress your width and elongate your legs. The common advice says “low angles are powerful, high angles are vulnerable.” That’s incomplete. The real mechanism is proportion manipulation. You’re not conveying emotion through angle. You’re restructuring your silhouette. Shoot from three inches below your eye level to trigger the power effect. Shoot from three inches above to trigger the elongation effect. Test both. Use whichever serves your outfit’s story.
Find Your Actual Best Angle By Moving
Stop shooting from one static position and calling it a day. Camera height isn’t a choice you make once. It’s a variable you test across a range. Move your phone or camera up and down in six-inch increments while standing still. Shoot at each position. This takes two minutes. This reveals which height makes your chest read as wider, which makes your legs read as longer, which makes your shoulders sit higher in frame. Different clothing activates different proportions. A wide shirt demands different camera height than a fitted shirt. A high-waisted pant requires different framing than low-rise.
The height that works for one outfit won’t work for another. Treat camera elevation like you treat outfit selection: intentional and specific to what you’re wearing. Shooting at eye level is neutral. Below eye level adds volume to your frame. Above eye level subtracts it. Your job is matching height to the visual story your outfit tells. Document which height works for which clothing category so you stop guessing next time.
The Biofeedback Loop: Your Body As A Communication Device
Open Postures Signal Permission
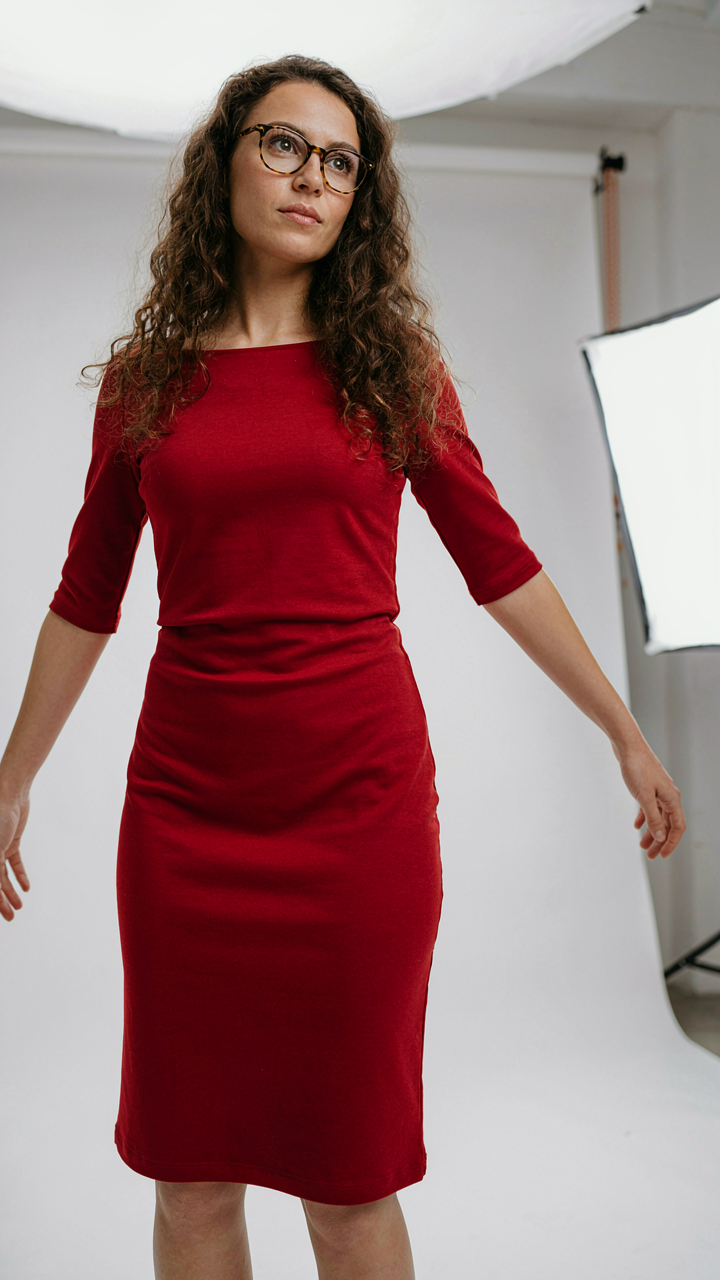
You want people to see you as trustworthy and in control. That’s the real reason this matters. Neuroscience calls this “postural expansion”—the measurable increase in physical space your body occupies. In outfit photography, expansion works the same way: shoulders back, arms away from torso, chest open. This isn’t confidence theater. Your nervous system registers the position first, then your face follows. The camera catches the genuine shift.
Closed postures do the opposite. Arms crossed, shoulders rounded, hands near center mass—these positions trigger your vagus nerve to downregulate arousal. You look introspective, guarded, deliberate. For outfit photos, closed postures work when the clothing demands attention over personality. The garment becomes the subject. Your body recedes. Choose expansion when you’re selling presence. Choose closure when you’re selling the piece itself.
Body Language Vocabulary For Intent
Linguistics treats language as a system of meaning units strung together to encode specific messages. Your body operates identically in photographs. Each joint position is a phoneme. Each limb arrangement is a word. String them together and you’ve communicated a complete thought before the viewer processes facial expression.
- Hip Pop: Shift weight to one leg, let the opposite hip rise slightly. This signals ease and approachability. Works for casual wear, creates visual rhythm in the frame.
- Arm Threading: Tuck one arm across your body while the other hangs or gestures outward. Signals sophistication and measured confidence without aggression or defensiveness.
- Shoulder Cant: Drop one shoulder lower than the other, angle torso away from lens. Communicates intrigue and movement. Prevents the flat, confrontational read of squared shoulders.
- Hand Placement On Fabric: Rest fingers on jacket lapel, pocket, or hem. Anchors attention to the outfit while your hand becomes part of the composition, not a dangling problem.
- Chin Tilt Down With Eyes Up: Lower your chin slightly while maintaining or lifting eye contact. Registers as engaged and thoughtful rather than distant or dismissive.
The sequence matters more than the individual positions. Move through two or three of these in a single shoot. Your body tells a story, not a static fact. The viewer’s brain tracks transition and flow—that’s what reads as natural. A single locked pose, no matter how textbook perfect, looks rehearsed and dead.
Minimalist Props, Maximum Effect: Objects As Storytellers
Everyday Items Ground The Pose
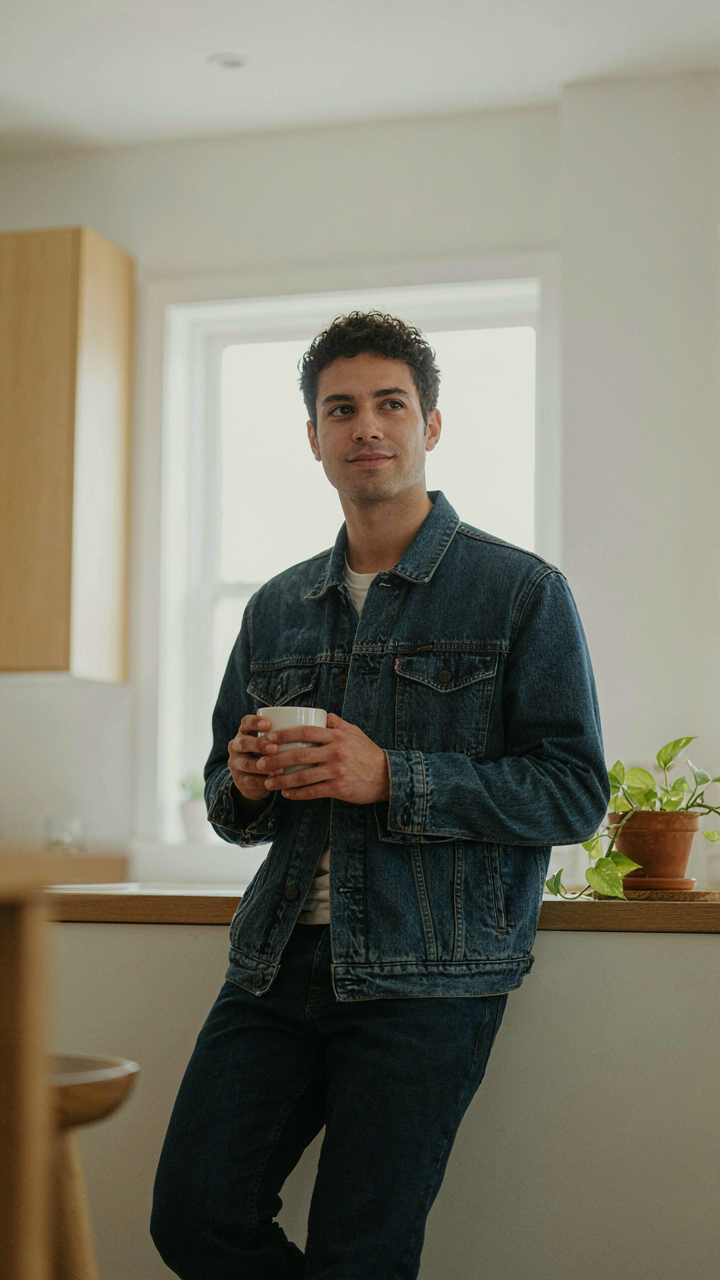
You want props because you’re afraid empty hands make you look lost. That fear is accurate. The real mechanism here borrows from visual weight distribution in composition: objects function as anchors that stabilize the frame and give your body a reason to occupy space. A coffee cup, book, or jacket draped over your arm isn’t decoration. It’s a justification for your posture that reads as intentional rather than uncertain.
Everyday objects work because they’re recognizable without demanding attention. A phone in your hand, a tote bag on your shoulder, or a notebook held at chest height creates a visual node that organizes the entire pose around it. The object becomes the narrative center, and your body arranges itself naturally in relation to that center. This eliminates the stiffness that comes from thinking too hard about what your limbs should do.
Redirect Attention With Strategic Placement
The common advice says “use props to fill dead space.” Wrong. Props function as gaze directors, not gap fillers. In photography, the eye follows lines and objects before it follows faces. A book held at an angle, a coffee mug positioned between hands, or a phone screen visible but not dominating creates a secondary focal point that lets your face breathe while keeping the frame active.
Place the prop slightly off-center or at a diagonal to create tension in the frame rather than symmetry. This forces the camera to register multiple points of interest, which reads as more natural than a centered, frontal stance. The prop pulls the viewer’s eye on a path, and your expression becomes the destination rather than the starting point. Execute this by positioning objects at your waist, chest, or in your peripheral line of sight, not directly in front of your face.
The “Cool Girl Posing Ideas” Fallacy: Why Effortless Is Engineered

Deconstructing Casual Poses Into Repeatable Mechanics
You want the pose to look accidental because you think accidental means you’re naturally photogenic. It doesn’t. Casual poses follow the same engineering principle as load distribution in architecture: you’re moving weight and limbs to places that create visual balance, not chaos. The difference between a slouch that reads as confident and one that reads as defeated is millimeters. Most advice skips this. It says “just be natural” or “own your vibe,” which translates to: figure it out alone while we sell you a preset.
The actual mechanism is asymmetry with intention. Stand square to the camera and you flatten. Rotate your shoulders away from the lens 15 to 25 degrees. Drop one shoulder lower than the other. Shift your weight to your back leg so your front leg can bend slightly or extend. Tilt your head toward your higher shoulder, not away. These aren’t subjective choices. They’re adjustments that create depth, line, and visual interest because they break a rigid grid. Your phone camera cannot distinguish between “trying hard” and “effortless.” It only reads geometry.
Movement Beats Stillness Every Single Time
Static posing is a myth that kills outfit photos. Motion creates layers within a single frame because your body occupies slightly different spatial positions as your camera captures the shot. Think of it like photography’s version of momentum: a still object has no trajectory, but a body in transition implies direction and energy. Walk toward the camera instead of standing. Shift weight between feet. Adjust your hands during the shoot, not before it. The blurred intermediate positions between poses read as naturalness because they are.
Most people pose once, take one photo, move on. Wrong. Your second or third adjustment is where the real shot lives. By then your body has warmed to the camera. You’ve stopped thinking about angles consciously. Your muscle memory has taken over. Shoot 15 to 20 frames while you’re transitioning between positions. Delete the dead frames. Keep the ones where your body momentum created line and shape. This is the protocol: movement across frames, not perfection in a single frame.
The Repetition Refinement Cycle: Iterating Towards Impactful Posture

Shoot Multiple Angles, Not Just One
You want proof that you look good without having to admit you care about looking good. Here’s the mechanism: every pose has a margin of error. A slight hip shift, shoulder rotation, or chin tilt moves you from unflattering to sharp. You won’t find this margin sitting still. Shoot 20 variations of the same outfit in one session. Change only one variable per shot: angle, arm placement, weight distribution, or head position. The volume gives you data instead of guesswork.
Most people take three shots and pick the least blurry one. That’s not iteration, that’s surrender. Your phone camera sees what’s actually there. It doesn’t lie for you. Review the shots immediately on a larger screen. Zoom in on your posture, not your face. Notice which variations elongate your frame, hide what you want hidden, or project confidence. The repetition reveals patterns you can’t feel in the moment because your brain can’t monitor itself while posing.
Isolate Your Baseline, Then Build From It
Pattern recognition beats wishful thinking. Compare your worst shot to your best shot side by side. What’s different? The answer is not “lighting” or “angles.” Look deeper. Is your chest open or collapsed? Are your shoulders at your ears or dropped? Is your weight in your front leg or back leg? These are posture mechanics, borrowed from kinesiology, and they determine whether fabric drapes or bunches. Your body is the variable you actually control.
Create a reference pose you return to each session. This becomes your baseline. Once you nail it, test deviations intentionally. Does a wider stance look better? Does turning 45 degrees instead of straight-on work? Does one hand in pocket versus both out change the vibe? Track what works and replicate it. Your most flattering pose isn’t a mystery—it’s a repeatable pattern you extract through comparison, not intuition.
Aesthetic Instagram Poses Aren’t Real: Curating Your Own Visual Language

Build A Signature Over Following Trends
You want the algorithm to recognize you instantly because that feels like you’ve “made it.” Here’s what actually works: trends in pose language move faster than you can execute them, so chasing them makes you invisible. The mechanism is pattern recognition. Your brain spots repetition and locks onto it. When ten thousand accounts use the same over-the-shoulder tilt and head cant, none of them stand out. The pose becomes wallpaper.
A signature pose works like a logo. It’s specific enough that followers predict it, consistent enough that it becomes yours. This doesn’t mean doing the same thing every shoot. It means developing a constraint. Some creators always shoot with one foot forward and weight shifted. Others always angle the torso away from the camera with the head turned back. The constraint creates coherence. Without it, your feed reads as random outfit documentation, not a visual identity.
Editing Creates The Real Consistency
The common advice is that poses matter most. Wrong. Two identical poses edited in different color grades read as completely different content. Editing is where your feed becomes recognizable or forgettable. Consistency in color temperature, shadow depth, and saturation does the heavy lifting that pose variety cannot match.
Pick one editing approach and lock it. This could be slightly desaturated with warm shadows, or punchy contrast with cool tones, or flat and bright. Apply it to every shoot for three months minimum. Your eye trains on it. Followers’ eyes train on it. The pose becomes secondary to the coherent visual system you’ve built. When you eventually shift, shift everything at once. Don’t edit one photo warm and the next cool.
The Unspoken Truth Of Bgc Pose Ideas: It’s About Energy, Not Emulation

Posture Signals Intention Before The Camera Sees It
You want to look credible in photos because people judge you in milliseconds, and a weak frame reads as weak conviction. Posture works like leverage in mechanics: a small angular shift at the spine multiplies the energy perceived across your entire silhouette. Shoulders back and down, chest open, chin parallel to the ground. This isn’t vanity. It’s the difference between appearing like you’re presenting yourself and appearing like you’re defending yourself.
The common mistake is overcompensating with exaggerated stiffness. That reads as performance. Your spine should extend naturally as if you’re reaching forward slightly into the frame, not bracing against it. Gaze matters equally. Eyes should track toward the camera lens or slightly off-axis, never downward or scattered. Consistency in this one mechanic transforms every single shot you take.
Authenticity Beats The Forced Expression Trap
Most pose guidance tells you to make a face. That’s backwards. The fierce expression, the pout, the smolder all work against you in outfit photography because they distract from what the outfit actually communicates. Your face should match the energy of the garment, not override it. If the piece is minimal and clean, a neutral or subtle expression anchors the visual. If the piece is bold, your face can lean into openness, not aggression.
The mechanism here is contrast and coherence. When your expression contradicts your outfit’s energy, the viewer absorbs conflicting signals and loses trust. Pick one authentic emotional state before you shoot and hold it across multiple frames. Not a fake smile. Not a forced intensity. Just the look on your face when you’re genuinely thinking about something that matters to you. That consistency is what reads as real.
The Only Posing Secret: Stop Chasing Trends And Start Embodying Your Own Damn Power

Every outfit photo pose that actually works comes from one place: you believing you belong in the frame. The trending angles, the hand placements, the lighting setups—they’re just permission slips for what you already know. Stop studying other people’s poses and film yourself moving naturally for five minutes today. Watch it back. That’s your real pose language. Your clothes aren’t the story. Your conviction is.