

The Authenticity Illusion: Why Generic Poses Fail

The Poses That Kill Your Shot
You want to look effortless because effort looks desperate, and desperate doesn’t sell. But here’s the mechanism nobody states: the more a pose tries to hit every angle at once, the more it telegraphs that you’re performing. Bodybuilding photography borrows from classical portraiture, which understood one rule decades ago—tension in the frame reads as tension in the subject. When you stack your feet, angle your hips, twist your shoulders, and flex your arms all in one synchronized movement, you’ve created a static object, not a person.
The mistake isn’t the poses themselves. It’s treating the camera like a judge at a competition. You’re holding every muscle in a locked position, which flattens the three-dimensionality of your physique and makes your body look compressed. The camera reads this as unnatural because it is. Your body doesn’t live in that configuration. It moves through space. Generic poses ignore that your muscles have rhythm and layers that only reveal themselves through slight shifts and breath, not rigid stacking.
When Perfection Becomes The Problem

Posed perfection fails because it removes the one variable that makes bodies look alive: micro-adjustment. Most advice tells you to “find your angle” and freeze it. Wrong. That’s not advice, that’s a trap. The difference between a shot that sells and one that looks contrived is often a three-degree shoulder roll or a half-inch weight shift that the photographer catches mid-movement, not after you’ve locked in.
When you overthink the pose, you hold your breath. You stop blinking. You don’t scan the frame. The photographer loses the window where your face matches your body. Your chest stays in one plane instead of expanding on the inhale. The lighting hits you the same way for forty shots instead of creating variation. The mechanism is simple: rigidity in the pose creates rigidity in the expression, which creates rigidity in the entire image. Loosen the pose structure and start moving through positions instead of holding them.

Beyond The Flex: The Movement Protocol For Impact
When Static Holds Stop Working
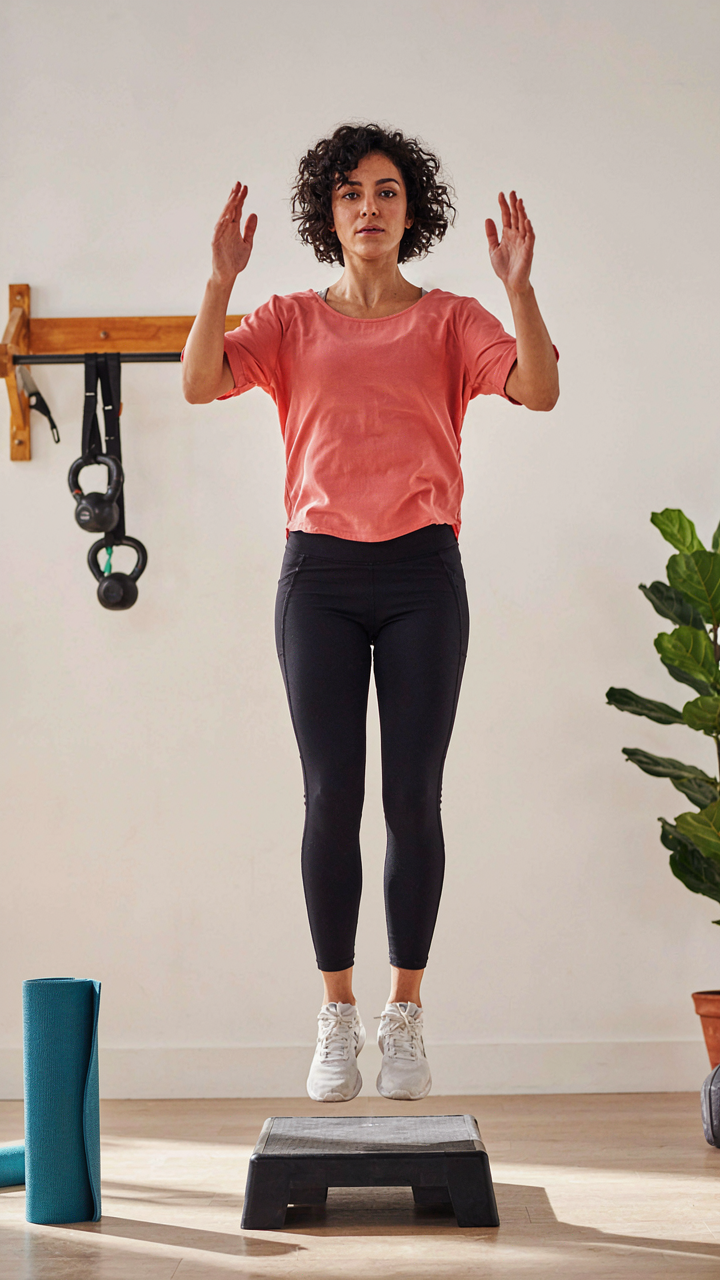
You want dynamic poses because you think they look better. The real reason: static holds reveal every flaw in your conditioning and body composition. The mechanism is physics borrowed from biomechanics. In statics, gravity pins weakness. In dynamics, momentum masks it—temporarily. A flex holds a position against gravity’s full force. A jump or sprint distributes that force across time and sequencing, letting weak points hide behind speed and blur.
Static holds teach you precision. You learn angles, light interaction, and muscle engagement under zero movement stress. But beginners confuse “easier to execute” with “more impressive on camera.” A perfect flex with poor conditioning reads as dead. A rough movement with authentic effort reads as alive. The distinction matters because photos compress three dimensions into two—movement adds the illusion of dimension that static poses sacrifice.
Running, Jumping, And Loaded Movement
The camera favors momentum over stillness because impact creates compression and definition that stasis cannot generate. First paragraph establishes context: action poses work because the human eye tracks change faster than it registers position. Your viewer’s brain processes motion before analyzing form.
- Sprinting or running strides: Capture the drive phase where legs extend and core tightens simultaneously. Shoot mid-stride for peak compression. Front-facing or profile angles show quad and glute engagement best.
- Vertical jumps or box jumps: Peak height creates the illusion of explosive power. Shoot at the apex where legs are fully extended and torso is upright. This position naturally showcases shoulder and core definition.
- Loaded carries or farmer carries: Heavy dumbbells or kettlebells at sides force postural tension that reads as strength. The weight creates visible strain in forearms and shoulders. Side angles emphasize one-sided loading and trapezius engagement.
- Sled pushes or prowler work: Forward lean angle creates automatic core tension and shoulder positioning. Shoot from the side to show the full body line under load. This angle exaggerates work capacity visually.
- Battle ropes or medicine ball slams: Explosive overhead or lateral movements create muscle pop during the concentric phase. Capture mid-movement when arms are at shoulder height. This catches the peak contraction without waiting for a hold.
Action poses demand one protocol: shoot on the moment of maximum tension, not maximum extension. A jump at its peak looks powerful because legs are locked. A slam at the moment of impact looks explosive because muscles are firing. Timing beats posing. Set your camera to burst mode and take 20 frames per action. One will land clean. The rest teach you the pattern.
The Unseen Angles: Mastering Gym Posing Ideas Naturally

Equipment As A Framing Device
You want to look natural because you’re terrified a forced pose will expose you as trying too hard. The mechanism is simple: equipment becomes a frame that justifies your body position and gives your limbs somewhere legitimate to go. Think of it like architectural framing in design. A doorway doesn’t feel awkward because the structure gives it purpose. A barbell, cable machine, or dumbbell rack works the same way. Your arms aren’t just hanging there looking uncertain. They’re gripping, holding, or positioned in relation to something real.
Place one hand on a rack or machine at chest height while standing perpendicular to the camera. This pulls your shoulder back, creates definition in your chest, and gives your hand a job. Step back into a bent-knee stance with one foot forward. The equipment anchors the shot while your body naturally angles away from flat symmetry. The camera catches dimension because the pose isn’t a pose. It’s you interacting with your environment.
Catching The Moment Between Effort
The common advice here is garbage: “Just be yourself and smile.” That produces stiff, self-aware photos. Real candid shots happen when you’re mentally focused on a micro-task, not on being photographed. Ask the photographer to capture you mid-set countdown, mid-breath reset, or studying your next lift. Your face tightens with genuine concentration. Your posture anchors itself automatically. You’re not performing. You’re competing with yourself in front of a camera.
The protocol is straightforward. Start a light warm-up set. Let the photographer shoot through three to five reps without instruction. Don’t look at the lens. Don’t change your breathing. Between sets, ask for photos while you’re standing there recovering, towel in hand, genuinely decompressing. These frames capture you as you actually exist in the gym: focused, tired, real. The best shot often lands when you’ve forgotten the camera is there.
Light & Shadow: Sculpting Your Physique With Gym Shoot Ideas

How Light Reveals Muscle
You want to look bigger than you actually are. The mechanism is simple: light creates contrast, and contrast creates the illusion of depth and separation. Borrowed from physics, we’re talking about directional intensity. Position a key light at 45 degrees from your body, angled slightly downward. This angle catches the peaks of muscle groups while leaving valleys dark, making striations visible and mass apparent even if you’re not stage-ready.
The common mistake is flat, even lighting from the front. That washes out definition. Instead, use a single strong light source from the side or slightly behind you at shoulder height. This rakes across your physique and exposes every contour. Move closer or farther from the light to adjust shadow depth. Test this with phone footage first. One directional light beats three diffused sources every time.
Where Shadows Matter Most
Shadows aren’t missing light. They’re negative space that makes positive space readable. Without them, your body reads as flat. Position yourself so the light creates defined shadows under your chest, between abdominal segments, and along the side of your arms. These shadows tell the viewer exactly where your mass is. The depth feels real because the brain interprets shadow as distance.
High-contrast setups work in controlled spaces. Outdoors during golden hour, position the sun behind and to the side of you, then face the camera with your body turned slightly away. Your front half catches warm light while your back half goes dark, creating a defined edge. The frame becomes about silhouette and form, not just surface texture. This setup requires no equipment and delivers results consistently.
The Psychological Warfare Of The Lens: Fitness Model Poses

Body Language As Status Signal
You want people to believe you’re dominant before they even see your physique. That’s the real game here. Evolutionary psychology calls this “dominance signaling,” and in fitness photography, your posture is the transmission mechanism. Humans read vertical space instantly. Take up more of it. Shoulders back, chest forward, chin level or slightly down. This isn’t confidence theater—it’s a measurable shift in how your nervous system broadcasts availability and threat level to the viewer’s primitive brain.
The camera amplifies everything. A collapsed chest reads as submission or fatigue. An open chest reads as health and control. Stand like you own the room because the lens will either confirm or demolish that claim. Your bones don’t lie. Pull your shoulders back hard enough to feel it, plant your feet shoulder-width apart, and let your arms hang with purpose—not stiff, not loose. The mechanism is simple: expansion signals resource abundance. Contraction signals scarcity. Pick one and commit to it in every frame.
The Neutral Face And Controlled Intensity
Most fitness photographers will tell you to “smile naturally” or “look powerful.” Both are incomplete. Evolutionary psychology frames facial expression as a negotiation between dominance and approachability. The camera reads intensity faster than warmth. A blank expression with direct eye contact signals authority. A genuine smile signals cooperation. You rarely need both in the same frame, so decide what you’re selling before the shutter opens.
Your eyes do the real work. Soft eyes read as weak. Dead eyes read as void. Strategic intensity—pupils slightly dilated, lower lids engaged, gaze locked on the camera—projects control without hostility. The mechanism: tense the muscles under your eyes slightly, narrow your focus to the lens, and let your natural pupils respond to that concentration. This takes practice because it’s not natural. Do it in the mirror fifty times before a shoot. The difference between “tired” and “dominant” is millimeters of facial muscle tension applied consistently.
The Environmental Advantage: Fitness Photography Poses

How Your Surroundings Anchor Your Pose
You want the environment to do the work for you so you look intentional instead of awkward. That’s the real mechanism here. In photography, the term “negative space” describes empty areas around your subject. In fitness poses, negative space becomes your co-star. A doorframe, a wall edge, a beam, or a railing gives your body a reference point. Without it, you’re floating. With it, you’re positioned.
The difference between looking posed and looking confident comes down to how your limbs interact with structure. Lean against a wall at a 45-degree angle to the camera and your torso automatically elongates. Step one foot onto a low bench and your leg gains definition that standing flat never achieves. The environment isn’t decoration. It’s a tool that corrects posture through friction and angle.
Outdoor Light Versus Indoor Constraints
Indoor lighting is predictable but limiting. Outdoor light changes every ten minutes, forcing you to adapt or fail. From a physics standpoint, diffusion is the key term: soft light spreads evenly while hard light creates contrast. Outdoors in open shade or during golden hour, natural diffusion flattens and flatters muscle definition. Indoors under studio lights, you control diffusion but lose the dynamic range that makes fitness photos look alive rather than clinical.
Outdoor settings demand you understand directional light. Side-light from the sun at 4 PM carves muscle definition that front-light cannot touch. Indoor gyms or studios with overhead fluorescents wash out muscle striations. Choose outdoor locations during early morning or late afternoon. Choose indoor locations only if you’ve controlled the lighting setup in advance. The environment you pick determines whether your pose reads as powerful or just posed.
Gear & Grit: Elevating Your Fitness Influencer Photoshoot

What You Wear Determines What The Camera Sees
You want the clothes to disappear so the physique becomes the subject. That’s the real reason you care about this section. The mechanism is contrast: fabric choice directly controls how much light bounces off your body versus how much gets absorbed. Dark colors absorb light and flatten definition. Light colors and metallic finishes reflect light and accentuate muscle separation. Cotton blends muddy the line between skin and fabric. High-stretch synthetic fabrics cling without bunching, keeping the silhouette clean.
Cut matters more than brand. A poorly fitted tank top hides shoulder width and trap development. Tank tops with armholes cut high and close to the collar maximize lateral delt visibility. Shorts or trunks should sit above the hip flexor, not at the waist, to showcase quadriceps length and glute separation. Fit tight enough to show shape, loose enough to move without restriction during posing. The goal is directness: nothing between the camera and your actual proportions.
Props That Build Narrative Without Stealing Focus
The common advice is to throw in random equipment for visual interest. That’s lazy. Props work in fitness photography only when they serve a specific narrative function and don’t compete with your physique for attention. Think in terms of scale: use props that appear small relative to your frame. A dumbbell works. A barbell works. A medicine ball works. A full cable machine doesn’t.
Color and texture drive the secondary narrative. A weighted rope creates visual tension and suggests motion. Resistance bands add lines that guide the eye toward muscle groups. Water bottles and shaker cups signal the lifestyle context without demanding attention. The positioning rule: hold or interact with the prop using one hand or side of your body, leaving the other side open to the camera. This creates asymmetry and prevents the prop from becoming a crutch that weakens the pose’s core message.
The Pre Shoot Protocol: Preparation For Poses Fitness

Fuel And Fluid Strategy For Visual Clarity
You’re here because you want to look bigger, leaner, sharper on camera than you do in the mirror. The real mechanism is this: your muscles are 75 percent water, and dehydration shrinks them visibly within hours. Carbs pull water into muscle cells through osmosis. You need both timed correctly, not vague advice about “staying hydrated all week.”
Shoot for 48 hours before your session: load carbs to push water into muscle tissue, then taper sodium and fluid intake the final 12 hours. This creates definition without the depleted, flat look. Drink 500 milliliters of water two hours before shooting, then stop. Eat a carb-heavy meal four hours prior. Your muscles will hold a full, defined appearance on camera for the window you need.
Dynamic Mobility Before The Camera
This isn’t about stretching. It’s about activation. Your muscles photograph smaller when they’re not neurologically primed. Blood flow into the muscle belly makes it appear fuller and more separated, and you control this through targeted movement, not stillness before you pose.
Spend ten minutes on band pull aparts, light dumbbell rows, and bodyweight circuit movements specific to your pose angles. If you’re shooting upper body, row variations prime the back and shoulders. If legs are the focus, walk lunges and glute bridges activate the target muscles. Finish with three sets of your intended poses without a camera present. This primes your nervous system and teaches your body the exact angle you need when it matters.
Editing: The Final Polish To Fitness Photoshoot Ideas
Know When To Stop
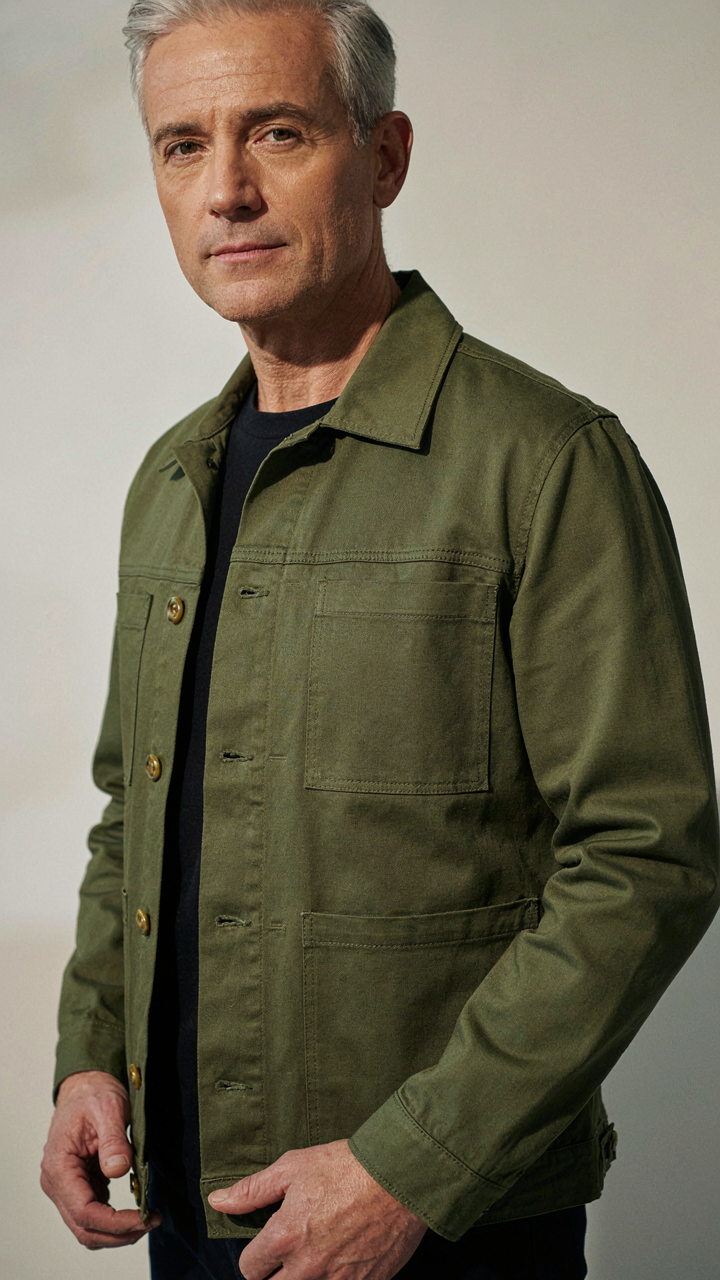
You want the edited photo to look like you, not like a fantasy version that makes people question if you even exist. The mechanism is contrast. Your raw photo has imperfections that signal authenticity. Over-editing erases that signal and triggers skepticism instead of trust. Subtle corrections sharpen what’s already there. Aggressive manipulation creates uncanny valley in still images.
Skin smoothing, blemish removal, and sharpening belong in fitness photography. Changing your jaw structure, reshaping your shoulders, or liquifying your torso does not. The line sits exactly where the edit stops looking like enhancement and starts looking like fabrication. Most beginners obliterate this line because editing software makes it too easy. Restraint wins. You keep the real you and fix only what distracts from your physique.
Color, Crop, And Conversion
Fitness photography lives or dies on contrast and saturation. Boost skin tone slightly, push shadows darker, and pull highlights brighter. This is physics applied to light: contrast reads as definition even when the actual muscle separation stays identical. Crop ruthlessly to eliminate dead space around your frame. A tight crop makes you fill the viewer’s entire visual field and compounds the perception of size.
Convert your final image to black and white only if you shot in conditions with poor or inconsistent color. Color grading should serve your skin tone and the background, not override them. Desaturate slightly if your lighting was flat, but keep enough color to look human. The final step: resize for your platform. Instagram’s compression algorithm eats detail in the mid-tones. Sharpen once more before upload to compensate. Post the image at native resolution or larger to prevent Instagram’s aggressive downsampling from destroying your work.
The Real Obstacle Isn’t The Camera; It’s Your Inability To Embody Your Earned Physique

You don’t need better poses. You need to stop treating your body like a stranger. The camera exposes what your mind already knows: you haven’t actually claimed ownership of your physique yet. Stand in front of a mirror today without clothes and hold each pose for thirty seconds. Notice what feels foreign. That discomfort is your real work. The poses mean nothing until your nervous system believes you belong in your own skin.