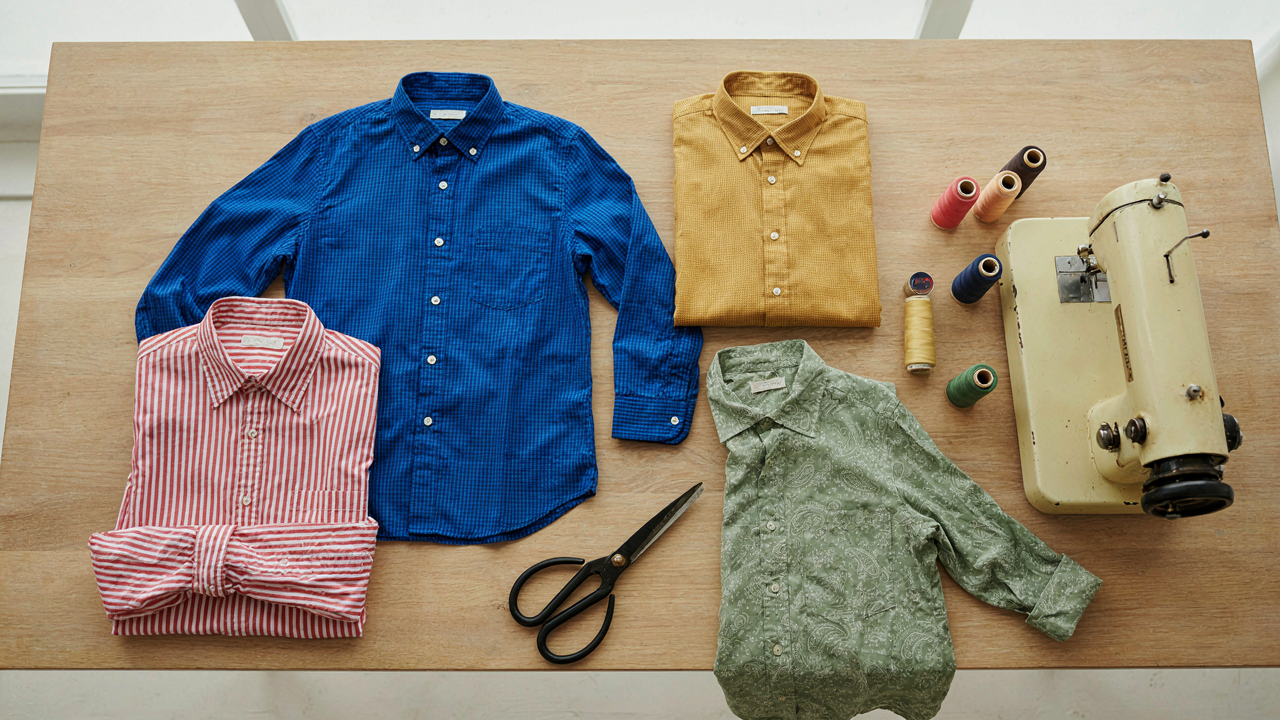
The Illusion Of New Why Your Button Down Upcycle Matters

The True Price Of Replacement Culture
You want permission to feel smart about keeping something instead of buying again. Here’s the mechanism: fast fashion operates on planned obsolescence wrapped in trend cycles. Brands engineer clothes to degrade within one to two seasons so you feel forced to replace them. A button down shirt, structurally sound but aesthetically tired, gets discarded while the manufacturing infrastructure that produced it demands your next purchase. The economics work backward from consumption, not forward from durability. Refashioning breaks this cycle by proving the garment still holds value that your attention can unlock.
The hidden cost sits upstream, not in your closet. Manufacturing a single cotton button down generates roughly 2,700 liters of water consumption and produces textile waste at every stage. Most people fixate on the price tag and ignore the extraction, dyeing, and transport infrastructure that makes that price possible. When you refashion instead of replace, you’re not being virtuous. You’re recalculating the actual unit cost of wear per garment and refusing to externalize the real expense onto resource depletion that someone else pays for later.
Extracting Dormant Value From What You Own

Reclamation isn’t sentiment, it’s inventory management applied to your wardrobe. Economics teaches the concept of sunk costs—capital already spent that can’t be recovered. Most people treat a worn button down as a sunk cost and abandon it. The refashioning approach reframes it: the material value exists independent of its original form. A wrap top constructed from a button down uses identical fabric, construction quality, and durability as the original garment. The only variable is labor, which you provide. You transform a liability into an asset by redirecting labor toward a garment you’ll actually wear.
The mechanism is straightforward: identify garments with structural integrity but aesthetic fatigue, then redirect their material toward silhouettes aligned with your actual life. A button down worn three times because the cut doesn’t match your body becomes a wrap top worn twice weekly. The fabric performs identically. The construction quality doesn’t degrade. Your wear frequency doubles while using zero new resources. This isn’t recycling in the industrial sense, where material gets processed and reformed. This is direct redeployment of existing inventory into higher-utility configurations.

Up Cycling Men’s Shirts: The Deconstruction Blueprint

Know Your Material Before You Cut
You want to believe the shirt you grabbed is a blank canvas. It’s not. The fabric quality, weight, and weave determine whether your wrap top holds its shape or collapses like wet tissue. Men’s button downs come in oxford cloth, poplin, linen blends, and chambray, each with different behavior when seams open and fabric drapes differently. Check the tag first. Cotton-poly blends hold creases longer but resist the fluid folds a wrap top demands. Pure cotton breathes but wrinkles faster once the structure of the original shirt disappears.
Fit matters more than size. An oversized men’s large works better than a fitted medium because you need excess fabric to wrap and tie. Feel the weight by holding the shirt flat against your body. If it’s thin enough to see light through it, the wrap won’t hold tension. Thicker fabrics that feel structured when folded are what you actually want. The collar and cuff construction also signals build quality. Reinforced collars mean the fabric around the neckline can handle stress when you repurpose it into the wrap’s anchor point.
Rip Seams The Way That Leaves Usable Fabric
Most guidance tells you to just grab a seam ripper and go. That’s incomplete. Seam rippers work, but they’re slow if you’re handling large pieces. The real mechanism comes from textiles manufacturing: you’re creating a controlled separation along a stress line that was engineered to hold together under tension.
Start with the side seams, not the shoulders. Side seams carry minimal structural load in the new garment, so small mistakes there don’t wreck the project. Use a seam ripper at a 45-degree angle, sliding under the thread rather than stabbing down into it. This prevents cutting the fabric fibers themselves. Work in short segments, maybe two inches at a time, then pull the thread gently. If you hit resistance, stop and re-angle. For larger pieces like separating the front placket from the body, consider small scissors for speed, but only after you’ve practiced on a sacrificial shirt. Remove any remaining thread bits with tweezers after seams open. You need clean edges because wrap tops expose raw edges or require flat seams that won’t tolerate thread debris. Take your time on the shoulder seams last, since those carry the most visual weight in the final garment.
The ‘Wrap Protocol’: Turning Form Into Function
What The Wrap Actually Does
You want this to work because wearing a wrap top signals intentionality—you didn’t grab whatever was clean. Here’s the mechanism: a wrap silhouette creates a defined waistline by overlapping fabric panels across the torso, anchoring one side and crossing to the opposite hip. The button down shirt has the raw material for this. Its front panels, when separated and repositioned, become those overlapping layers. The fit improves because you’re no longer fighting against the shirt’s original shoulder seams and button placement.
The wrap doesn’t need to tie at the side like traditional wrap dresses do. On a refashioned button down, you’re leveraging the existing buttons and fabric weight to hold the overlap in place. This matters because it removes the ongoing adjustment problem—wrap dresses slide and shift throughout the day. A button down’s structured cotton or linen holds position. You’re converting a shirt designed for closure into a garment designed for layering.
Seams Are Your Measurement Points
Most refashion advice skips this: measuring wrong kills the fit before you cut. Treating the seam placement like a tailor’s blueprint, not a constraint, changes everything. The side seams of the original shirt mark where the torso width lives. You need those measurements before deciding how much fabric to remove or retain for the wrap overlap. Without this step, you either cut too much and lose the ability to cross panels, or too little and create bulk at the centerline.
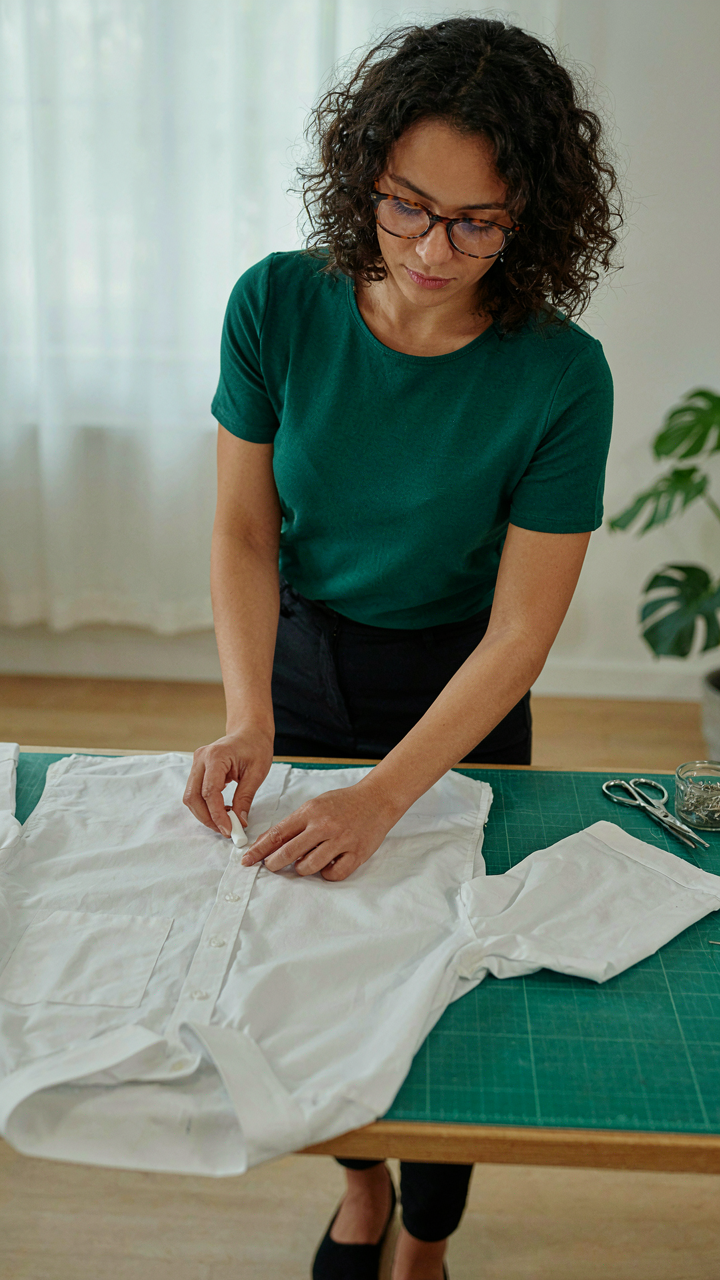
Start by laying the shirt flat and measuring from the side seam to the center front button line on both the left and right sides. Note the distance. For a wrap to work, you need at least four to six inches of fabric beyond the centerline on the overlap side so it reaches comfortably around to the back hip without pulling. Mark these points with chalk before you cut anything.
Button Up Shirt DIY: Essential Tool & Material Selection
Hand Tools Beyond The Sewing Machine
You’re buying tools to avoid failure, not because you actually need them. The real mechanism is this: a sewing machine handles fabric joining. Hand tools handle precision, control, and the corrections a machine can’t touch. You need them before you even thread a needle.
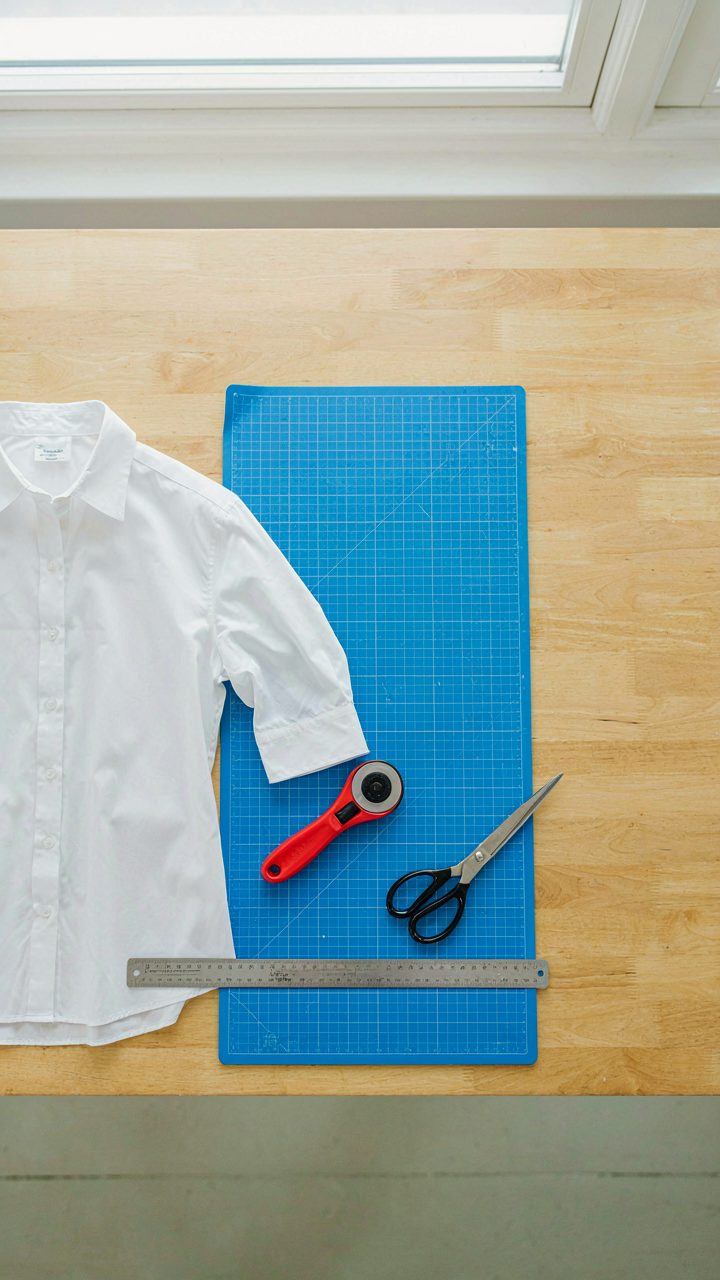
- Seam ripper: Removes stitches cleanly without blade damage. Essential for unpicking original button holes and seams you’ll reconstruct into wrap closures. Beats scissors every time.
- Rotary cutter and self-healing mat: Cuts fabric in straight lines faster than scissors and with zero fraying on the cut edge. Non-negotiable for wrap top panels that require clean geometry.
- Fabric scissors: Dedicated shears cut through multiple layers without dragging. Dull scissors destroy button down cotton by pulling fibers instead of severing them cleanly.
- Measuring tape and ruler: A wrap top’s fit depends on exact hip and waist measurements. Metal rulers catch on fabric less than plastic and hold straight edges when you mark fold lines.
- Chalk or fabric pencil: Marks placement lines and dart positions without leaving permanent residue. Water-soluble chalk dissolves; pencil marks fade after washing.
The machine handles volume. Hand tools handle intent. You skip hand tools because they feel optional. They’re not. Without a seam ripper, you waste an hour ripping with scissors and shredding fabric. Without a rotary cutter, your wrap panels look crooked because hand-cut edges trigger visual distortion in how the top drapes.
Thread, Interfacing, And Embellishment Choices
Most refashion advice tells you to match thread color to fabric. That’s incomplete. Thread thickness, fiber content, and weight all affect how your wrap top behaves at stress points like the waist tie attachment and button holes you’re converting to eyelets.
Use polyester or cotton thread for button down cotton shirts. Polyester holds tension better under the repeated pulling a wrap closure creates. Weight matters: 40-weight all-purpose thread works for standard construction. 30-weight or 50-weight creates visible stitching that either looks intentional or sloppy depending on whether you chose it or defaulted to it. For interfacing, fusible varieties save time, but non-fusible interfacing in the wrap’s waist tie delivers more reliable structure under repeated tying. Embellishments complicate refashion. Beads or topstitching add visual interest but require you to plan them into the pattern before you cut. Adding them after construction looks patched, not refined. If you want surface detail, decide it before fabric hits scissors.
Upcycling Shirts Ideas: From Button Up To Blouse Mastery

Where One Cut Changes Everything
You want to feel resourceful without actually doing difficult work. Here’s the mechanism: leverage in physics means applying force at the right point to move massive weight with minimal effort. A button down shirt refashion works the same way. You don’t rebuild the garment. You identify the single structural element that, once altered, collapses the original form and births the new one. The wrap top conversion hinges on this: removing the button placket and reorienting the front panels transforms a fastened shirt into a tied closure without reconstructing sleeves, collars, or side seams.
The leverage point isn’t random. It’s the buttonhole column itself, a stress point engineered to hold the shirt closed against body tension. When you remove this feature, the front panels want to overlap naturally. The shirt’s existing length and width suddenly work for wrapping instead of buttoning. You haven’t added complexity. You’ve removed the constraint that locked the garment into its original function.
The Structure That Holds You Back
Most refashion guides miss this: the button placket is structural reinforcement, not decoration. It’s a doubled layer of fabric that runs down the front, designed to resist the stress of repeated fastening. Identifying weak points means recognizing which structural elements you can remove and which ones actually stabilize the garment.
The seams connecting the front panels to the side panels become your pressure points during wrapping. If these seams are shallow or sewn with single stitching, they’ll fail under tie tension. The collar attachment also matters, but differently. A reinforced collar can stay. A flimsy one will pull the neckline out of shape when you tie the wrap. Check the back yoke seam where the front meets back. That seam absorbs wrap pressure during wear. If it’s weak, reinforce it before removing the placket.
Mens Shirt Upcycle Woman: Adapting Masculine To Feminine

Darting And Shaping For Feminine Curves
You want this to actually fit your body instead of hanging like you borrowed your boyfriend’s closet. The mechanism is simple: men’s shirt blocks are built on a straight grain line from shoulder to hem. Women’s patterns use bias and dart placement to follow curves. You’re not adding fabric here, you’re redistributing it where it matters.
Take a men’s button down and mark the natural curve points: underarm, waist, hip. Sew a vertical dart at the side seam from armpit toward hem, stopping before the shirt tail. The dart doesn’t need to be deep, maybe half an inch at the seam. Press it toward the back. This single move converts a boxy silhouette into something that acknowledges you have a waist.
Sleeve And Collar Transformations
Most refashion guides tell you to just crop and call it done. That’s lazy and leaves you with dead sleeves and an unresolved neckline. Here’s what actually matters: a men’s collar is cut to sit flat against a broader chest. When you wear it on a smaller frame, it gaps at the front and looks half-finished.
Remove the collar entirely and bind the neckline with bias tape or fold the raw edge inward. For sleeves, cut them at the cap where the armhole rounds, not halfway down the bicep like everyone suggests. This preserves the sleeve’s natural taper and gives you a usable opening for layering or baring your shoulder. Finish the raw edge with a rolled hem or narrow binding. The wrap converts what’s left into an intentional design detail, not a modification.
Upcycled Mens Shirt: The Finishing Touch Fallacy

Where The Hem Lives Or Dies
You want this to look intentional, not like you ran out of fabric. That’s the real fear here. The hem determines whether your wrap top reads as deliberate construction or hasty alteration. In garment engineering, tolerance is the acceptable deviation from specification. Your hem tolerance sits at plus or minus a quarter inch. Anything wider telegraphs amateur work.
Most refashion guides skip the actual measurement protocol. They say “hem it” like that instruction means something. It doesn’t. Measure from your intended wrap point straight down the length of both front panels. Mark with tailor’s chalk every six inches. Use a ruler, not your eye. Sew a straight stitch half an inch from the raw edge, then fold and topstitch. One consistent width on both sides. Speed ruins this; precision saves it.
Buttons Under Load
Your wrap top’s buttons carry real structural tension they never carried on a dress shirt. This isn’t cosmetic reinforcement. Load engineering teaches us that stress concentrates at attachment points. The button hole weakens first when you cinch the wrap. Reinforce before you need to.
Cut a small square of interfacing, approximately one inch by one inch. Fuse it to the wrong side of the fabric directly behind each buttonhole before you wear the garment. Use medium-weight fusible interfacing. For the buttons themselves, sew through all layers of the shirt fabric plus a small button on the reverse side as a backing. This distributes force across a wider area. The wrap top’s constant tension will test these anchors immediately.
Button Up Shirt Upcycle: Advanced Design Principles
Layering Fabrics For Visual Weight
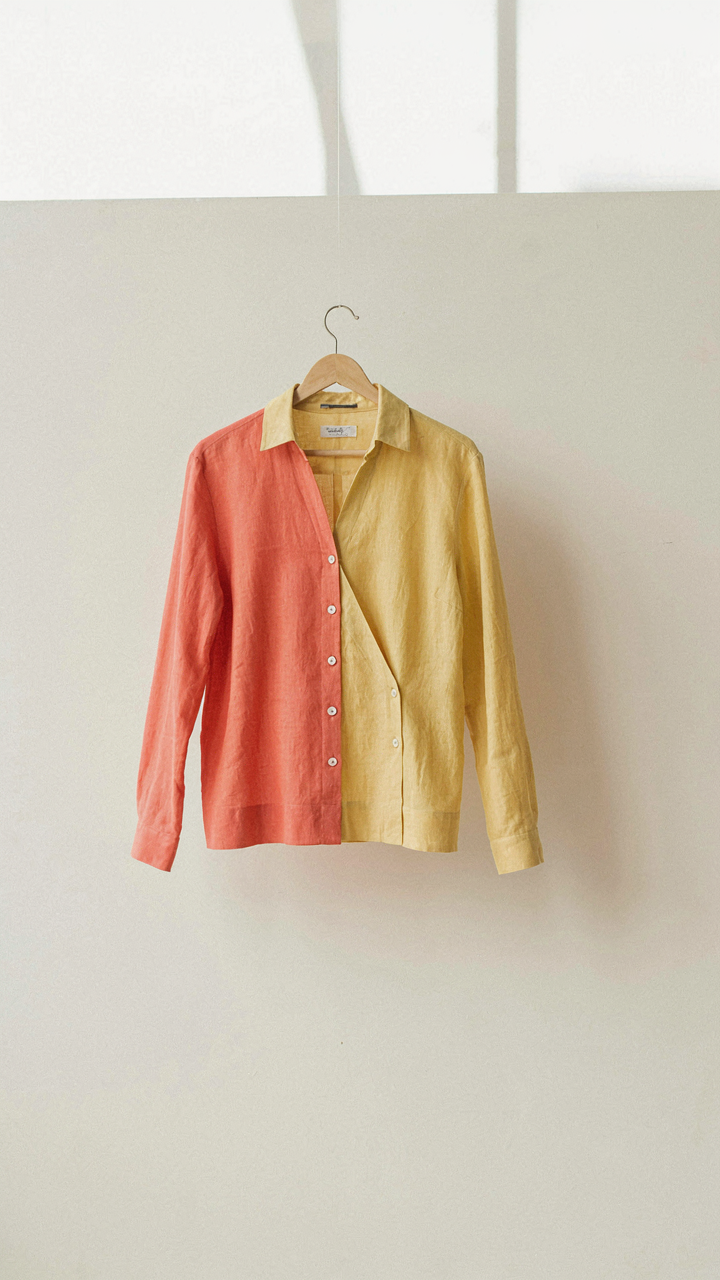
You want this to look intentional, not like you ran out of material halfway through. That’s the real reason you care about mixing textures—it signals control. The mechanism is simple: fabric weight creates perceived value. A linen shirt paired with a silk scrap or cotton twill overlay doesn’t just look different. It reads as designed. The eye registers contrast in drape and light reflection as deliberate choice.
When you combine fabrics with different thread counts, you’re exploiting a principle from visual hierarchy. Dense fabric anchors the eye; loose weave moves it. Start by identifying which sections of your shirt will carry weight and which will float. A heavyweight cotton twill sleeve paired with a lightweight linen body panel forces the viewer to process layers. Stitch them with visible topstitching in matching thread to make the transition unmissable, not apologetic.
Asymmetrical Cuts And Drapes
The common advice here is wrong: asymmetry isn’t about being bold or artistic. It’s engineering. You’re solving a structural problem—a standard shirt front has too much fabric for a wrap silhouette, so you remove it strategically from one side and redistribute the excess as drape on the other. This isn’t decoration; it’s necessity dressed up as intention.
Study how fabric behaves under gravity. A vertical cut at the side seam from armpit to hem releases fabric that can wrap around the body without bunching at the center front. The key is cutting shallow angles rather than sharp diagonals. A 15-degree angle from vertical creates elegant bias drape. A 45-degree angle creates a tent. Measure twice on pattern paper before touching shears. Sew the new side seam with a rolled hem or bias binding to prevent fraying and keep the line clean against bare skin.
Blouse Upcycle: The Economics Of Creative Labor

What Your Time Actually Costs
You’re wondering if refashioning is worth it because you’re afraid you’re wasting hours on something cheaper to buy. Here’s the mechanism: most people calculate labor value backward. They divide the finished item’s retail price by hours spent, then feel broke when the math doesn’t match a job wage. That’s not how creative labor works. Economics calls this “opportunity cost”—the real value isn’t what you made, it’s what you stopped doing to make it. Every hour refashioning a button down shirt is an hour you didn’t spend on income, rest, or something else. That’s your actual number.
The second issue: you’re comparing your labor to factory labor priced in bulk at scale. A factory produces five thousand identical wrap tops. You produce one. Their per-unit cost is artificially low because overhead is distributed across volume. Your actual cost per piece is higher because you’re a single unit of production. Stop comparing. Instead, track what you’d spend to outsource the same work—a tailor charges 40 to 80 dollars to reconstruct a shirt. That’s your baseline. If you can refashion in three hours, you’ve either saved money or created value depending on what the finished piece sells for or means to you.
Building A Refashioning Practice That Compounds
The trap is treating refashioning like a hobby instead of a system. One-off projects don’t reveal patterns. You need volume to see where time actually gets spent—which seams take longest, which techniques become automatic, which mistakes repeat. Sustainable practice means doing this consistently enough that learning sticks. Most people attempt three refashions, get slower each time because they relearn steps, then quit. That’s not sustainability. That’s inefficiency masquerading as interest.
The protocol: refashion the same type of conversion—button down to wrap top—for at least ten pieces before switching designs. Track hours on each one. By piece seven, you’ll see time drop by thirty to forty percent because your hands know the sequence. Your eyes recognize fabric behavior faster. Seam placement becomes instinct. That’s when the economics flip. After ten pieces, you either have a repeatable skill worth money or data proving it’s not worth your time. Either way, you’ve stopped guessing.
The Real Obstacle Isn’t Your Skill With A Needle; It’s Your Addiction To Convenience

You’ll buy another shirt instead of refashioning this one because it’s easier. That’s the real problem. The skill takes two hours. The resistance takes forever. Pick one button down from your closet right now and commit to converting it this week. Not next month. Not when you have time. This week. The only thing standing between you and a completely different wardrobe is your willingness to do one uncomfortable thing instead of scrolling for a replacement.