

The Illusion Of Ease: Why Most DIY Wide Leg Jeans Fail

People Assume Scissors Solve The Problem
You think this is cheap. You want to avoid paying a tailor. That’s the real reason you’re here. But cutting skinny jeans wider is not a simple expansion problem. It’s a structural failure waiting to happen. The inseam, outseam, and crotch curve all lock together as a system. Widening the leg without recalibrating those anchor points creates pants that don’t sit on your body correctly.
Most people cut straight up from the hem, believing the leg will simply expand. This destroys the knee placement and crotch geometry. The result is jeans that twist around your thigh, bunch at the hip, or sit too low in back. You’ve now wasted material and time on something unwearable. The fabric itself doesn’t stretch to compensate for structural changes you’ve made.
Geometry Dictates What Fabric Can Become

Think of this like engineering. A jeans leg is a tapered cone narrowing toward the ankle. You cannot simply remove that taper and expect the same garment to function. The taper creates the form that holds the leg stable on your body. When you eliminate it, you change the load distribution across seams and stress points.
The real work happens before the cut. You need to understand how much extra fabric lives in the seam allowances along the inseam and outseam. Skinny jeans from the 2010s typically had 1.5 to 2 inches of seam allowance built in. That’s your usable material. Beyond that, you must splice in new fabric, which requires seamwork that most people don’t have the skill to execute cleanly. Without this knowledge, you’re cutting blind.

Deconstructing The Skinny: Essential Prep For Modified Jeans

Where To Cut The Seams
You’re worried about ruining jeans you paid for. That fear is what stops you from starting. The real issue is that skinny jeans use inseam stitching that runs the entire leg, and that seam is your primary leverage point for widening. You need to know exactly where to separate the fabric without destroying usable material for reconstruction.
- Inseam from crotch to hem: This is your main target. Cut along the existing thread line using a seam ripper to separate both pant legs at this single seam. You’ll gain width on both sides simultaneously once you reposition and restitch.
- Outseam as a secondary intervention: If the inseam alone doesn’t yield enough width, the outseam (from hip to ankle on the outside) becomes your second cut point. This requires more precision because you’re working with a visible seam that affects the pant’s line.
- Side seam strategically: The side seam runs from waistband to hem and holds the most structural tension. Only cut this if you’re adding a full gusset panel or doing a complete reconstruction. Partial cuts here create unstable fabric sections.
- Crotch point reinforcement: Before cutting anywhere, mark the crotch point (where inseam meets crotch curve) with a small stitch or fabric pen. This prevents you from accidentally cutting into the crotch seam, which causes catastrophic pant failure.
- Hem preservation protocol: Cut your seams starting from the bottom of the leg, working upward. Stop 2-3 inches before the original hem. This keeps your hem intact and eliminates the need to re-hem after widening.
The inseam is where most DIY conversions succeed or fail. A clean cut here preserves both pant legs and gives you maximum usable fabric for panel insertion. Use a dedicated seam ripper, not scissors. Scissors crush fibers and create fraying you’ll spend hours cleaning up later.
Fabric Behavior Under Tension And Heat
Skinny jeans exist because denim has enough rigidity to hold a narrow silhouette without collapsing. That same rigidity is now your problem. When you widen the legs, you’re fighting the fabric’s memory and its inherent stretch properties, which react differently based on fiber composition and weave density.
High-stretch denim (typically 2-4% elastane mixed with cotton and polyester) wants to snap back to its original shape. Rigid denim (100% cotton or minimal elastane) holds its new shape better but requires more aggressive intervention to accept width. Your prep work depends entirely on which type you’re working with. Stretch denim demands panel inserts because the fabric actively resists staying wide. Rigid denim can tolerate gradual widening with less structural support, though you still need strategic gussets at stress points like the knee and calf where the fabric originally curves inward most sharply.
The ‘Geometry Of Flow’ Protocol: Achieving True Wide Leg

Where The Inseam Actually Breaks
You want this to look intentional, not like you failed at tailoring. The real mechanism here borrowed from apparel engineering: you need to understand taper as a vector, not a style. Skinny jeans taper from hip to ankle. Wide leg reverses that vector by expanding from knee downward. The inseam is where this expansion begins, and it’s the first thing people notice because it’s the hardest to fake.
Most people just cut and add fabric. That’s incomplete. The inseam break point determines whether the jeans read as deliberate wide leg or as a botched alteration. On a skinny jean, the inseam typically sits 6 to 8 inches above the ankle. To transition to true wide leg, you move that expansion point to approximately 2 to 3 inches below the knee. This isn’t arbitrary. Below this point, you have enough vertical distance for the leg to flare naturally without looking cramped or disproportionate. Measure twice. Cut once.
The Flare Angle And Seat Balance
Flare isn’t random geometry. The angle of expansion from knee to hem determines whether the silhouette reads as balanced or lopsided. Start at 2 inches wider than the original inseam width at the knee, then expand 3 to 4 additional inches at the hem. This creates a gentle 15 to 20 degree angle on each side of the leg. Steeper angles look costume-like. Shallower angles fail to register as wide leg at all.
The seat stays untouched until you lock in the flare angle. Once you commit to the inseam geometry, re-grade the outseam to match. The outseam flare should mirror the inseam flare, or the jeans will pull and twist at the hip. This is where balance lives. Symmetrical expansion around the leg creates the silhouette. Asymmetrical expansion creates a fitting disaster. Test the angle on scrap fabric first if this is your first conversion.
Integrating Side Panel Jeans: The Reinforcement Principle
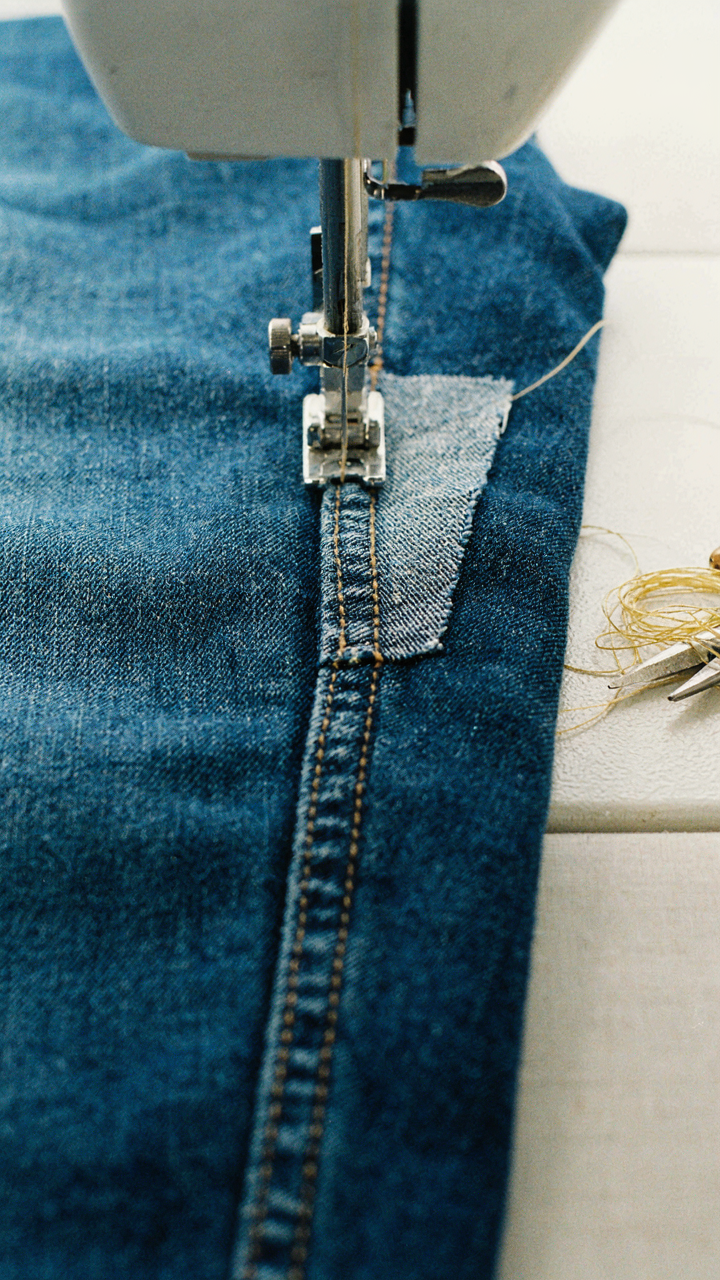
Matching Fabric Weight And Visual Continuity
You want the panels to disappear into the existing jean, not announce themselves like a patch. That’s the real fear here—that your modification looks cheap or hastily repaired. The mechanism is fabric weight matching: heavier denim panels on lighter jeans create visual breaks; lighter panels on heavy denim show every shadow of the seam. The panel fabric must fall within one weight category of your original jeans to read as intentional design rather than correction.
Cotton content and weave pattern matter equally. A side panel cut from raw denim sewn into a garment-dyed jean will catch light differently, even at the same weight. The yarn twist, slub variation, and fading direction all influence how the eye reads the seam line. Source panels from deadstock that matches your jean’s era or production line when possible. If that’s impossible, pre-wash and age the panel fabric to approximate the color shift and handle of your base jean before installation.
Seam Placement And Load Distribution
Think of this through structural engineering: stress concentrates at points of discontinuity. Your original inseam carries vertical load from body weight and movement. When you cut and insert a panel, you create two new seams where one existed. Each seam now bears partial load instead of one seam bearing all of it. This is actually mechanically superior—if you execute it correctly, your jeans become more durable, not less.
The inseam allowance on most jeans runs 0.5 to 0.625 inches. Preserve this depth on both sides of your inserted panel, or you’ll create a weak point where the new seams meet the original fabric. Use a triple-stitch or box-stitch pattern (four parallel stitching lines forming a rectangle) at the intersection points where your panel meets the original inseam. This distributes force across multiple thread lines and prevents blowouts at high-stress zones during wear and washing cycles.
Upcycled Straight Leg Denim Bottoms: The Material Sourcing Strategy

Which Donor Jeans Actually Work
You want to skip the waste and the failure. Most people grab whatever skinny jeans are lying around, then hit a wall halfway through the project. The real constraint is inseam length and fabric weight, not sentiment about that pair you wore in 2015.
Denim weight determines how much fabric you can extract per pair. A 12-14 ounce pair gives you usable yardage from the legs, waistband, and inseams. Lighter denims below 10 ounces tear under tension during deconstruction and don’t hold seams well after reconstruction. Inseam length needs to be at least 30 inches to yield enough linear material to increase leg opening from the original 6-7 inch width to a true 9-11 inch wide leg opening.
Cutting Patterns That Preserve Maximum Fabric
The supply chain logic here matters: you’re converting constrained input into a different output. Deconstruction order determines how much material survives the process intact. Cut out pockets first, separate the inseams, then flatten the leg panels before removing stitching. This sequence keeps the largest panels whole instead of fragmenting them into scraps.
Most guides skip this and tell you to rip everything apart at once. You end up with shredded thread everywhere and panels too small to use. Lay each deconstructed panel flat, measure the usable area (excluding heavy faded hems and pocket holes), then mark your new leg opening width directly on the fabric. Position the pattern to use the strongest central portion of the denim, avoiding edges that have worn thin or have existing damage.
The Bell Bottom Blueprint: How To Make Wide Leg Jeans

Work The Seams First
You want permission to skip the hard part. Physics applies here: leverage means moving a fulcrum, not pushing harder. The inseam is your fulcrum. You’re not widening jeans by adding fabric everywhere. You’re relocating the existing material by opening seams strategically, then redistributing what’s already there. The inseam holds more fabric than any other seam on skinny jeans. Release it, and you’ve unlocked the mechanism to actually make this work.
Open the inseam from ankle to knee on both legs. This is the cut that determines whether you get flare or just a loose tube. The fabric stored in that seam—the excess dart that makes skinnies skinny—becomes your raw material. A seam ripper takes thirty minutes per leg. Pressing the opened seam flat matters more than the rip itself because wrinkles now become permanent folds you’ll sew into the new silhouette.
Measure Before You Sew Anything
Feedback loops fail when people guess the endpoint. Try on the jeans with the seams open. Stand. Sit. Walk. Mark where the leg hits your calf, ankle, and hip with tailor’s chalk while wearing them. The visual you want now determines every stitch after. Most people skip this and end up reseaming twice because they eyeballed it the first time.
The opening should graduate from narrow at the thigh to wider at the hem. Measure the width at three points: mid-thigh, knee, and ankle. Write these down. This becomes your template for the new seam line. You adjust based on what actually fits your body, not what the internet says wide leg should look like. Pin the new seam before you sew it. Wear the jeans pinned for a full day. Only then commit to thread.
Beyond The Buzz: How To Make Wide Leg Jeans Narrow (If You Messed Up)

Fixing Blown Out Seams
You’re worried you wasted fabric and time. Here’s the mechanism: seams are load-bearing structures. When you let out inseams too aggressively, the thread tension holding the leg together weakens. The fabric pulls, the stitching fails. You can’t fix this by re-sewing the original seam line because the hole remains. Instead, you create a new seam one-quarter inch inward from the blown section, running the length of the leg. This closes the gap and redistributes tension across fresh fabric.
The practical fix requires a walking foot on your machine and thread matching the original jeans weight. Sew parallel to the damaged seam on the inside leg panel, then trim the excess fabric and overcast the raw edge to prevent fraying. This narrows the leg by half an inch per side maximum without compromising structure. Don’t attempt this if the damage runs along the crotch seam or inseam curve, the stress concentration point makes repair unreliable.
Preventing Future Mistakes
Stop treating alterations like a reversible process. They’re not. Seam removal leaves permanent needle holes in the fabric weave. Once the thread exits, the fibers are compromised. The only prevention is taking exact measurements before cutting a single seam. Measure the original skinny jean inseam width at three points: hip, knee, and ankle. Record the current width and the target width. Sketch the taper angle on paper. Most people skip this step and eyeball it, then panic when the legs are too wide.
Mark your seam line with tailor’s chalk before removing anything. This gives you a visual reference to stay within a safe margin, usually one-quarter to one-half inch per side depending on fabric weight. Take a test pair you don’t wear and practice the full conversion once. You’ll catch your mistakes on expendable denim instead of your favorites. The difference between a clean alteration and a salvage job is always thirty minutes of planning beforehand.
The Tailor’s Toolkit For Diy Bell Bottom Jeans With Fabric

What You Actually Need Beyond The Sewing Machine
You want to avoid spending money on tools you won’t use, so here’s the mechanism: a sewing machine alone can’t add fabric panels without the infrastructure to measure, cut, and attach them accurately. You need precision instruments, not convenience items. A seam ripper removes the inseams cleanly without damaging denim fibers. A rotary cutter with a self-healing mat lets you cut new fabric panels in straight lines at speed. A tape measure—at least 60 inches—tracks inseam length and panel width without guessing. A pattern weight holds fabric flat during cutting so you don’t shift material mid-stroke.
The common advice stops at “get a sewing machine and you’re done.” Wrong. Denim’s weight and structure demand tools that handle tension and thickness. A point turner flips fabric corners without stretching. Pins or clips secure panels before stitching. An iron with steam flattens seams open after sewing, which matters because denim won’t cooperate with folded seams the way lighter fabric does. These aren’t luxury items. They’re the difference between a wearable result and a project that pulls apart at the inseams after two wears.
Where Spending More Saves Time And Fabric
Think of tool quality through an engineering lens: friction is the cost. A cheap seam ripper snags threads and forces you to salvage work. A quality ripper cuts thread cleanly and moves faster, which means less time ripping and more time cutting new panels. Buy once, buy right. A rotary cutter from a reputable brand holds its edge through dozens of cuts. A dull blade tears denim fibers instead of slicing them, which means the new panels won’t sew flat and you waste fabric.
Invest in a 24-inch ruler and a self-healing mat rated for rotary cutters, not a small ruler and a thin cutting surface. You’ll measure once instead of twice. Your fabric panels land straight on the first attempt. Steam irons matter too. A basic iron leaves wrinkles and shine marks on denim that catch light. A quality iron with consistent heat and steam output flattens seams so they sit flush, which is what determines whether the final hem hangs right. Spend 30-40% more on core tools and recover that cost in fabric you don’t waste and time you don’t lose to redoing work.
Finishing Strong: Professional Touches For How To Make Jeans Wide Leg

The Hem Decides Everything
You care about this section because a botched hem kills the whole project—all that work vanishes if the leg opening looks sloppy. The mechanism is simple: the hem is the frame. A crooked or bulky frame makes even perfect proportions look amateur. Your eye reads the bottom line first.
There are two viable approaches. A blind stitch hem sits invisible on the inside and works best for raw or finished hems on heavy denim. A machine-stitched hem visible from outside works faster and holds better on jeans that move, though it trades invisibility for durability. Measure twice from the inseam. Mark with tailor’s chalk or a washable pen. Cut straight across, never at an angle. A single fold to depth, pressed, then stitched creates clean geometry. Machine hems on jeans typically run 1.5 to 2 inches deep.
Shape Memory Requires Heat And Time
Fabric doesn’t stay where you leave it without reinforcement. Pressing and steaming work through thermodynamics—heat relaxes fibers, then cooling locks them into position. This isn’t optional; it’s the mechanism that makes wide leg look intentional instead of wrinkled.
Press seams flat before hemming. Use medium heat on denim, never high. Hold the iron in place for five to ten seconds per section, moving methodically down each seam. Once hemmed, steam the entire leg opening from inside to outside, then let it cool completely before wearing. The cooling phase matters as much as the heat. Denim that’s still warm stretches back toward its original shape. Cold denim holds. Wash the jeans before final pressing to remove any residual chemicals from the original manufacturing.
The Real Obstacle Isn’t The Fabric; It’s Your Aversion To Precise Execution

Most people fail at this because they treat it like a casual project. You either commit to the seam work or you don’t. Get a tailor or learn it yourself this week, not next month. Measure twice, cut once. The transformation works if you execute it; it doesn’t work if you half-ass it. Your skinny jeans aren’t the problem. Your indecision is.