
Introduction
Resistance Band Workout Techniques For Effective Home Training offer a flexible and accessible way for anyone to build strength without heavy equipment. Resistance bands are elastic bands that provide different levels of resistance, making them useful for a variety of exercises. Their light weight and portability make them particularly suited for home use or when traveling.
This article will guide you through effective techniques and methods to maximize your workouts using resistance bands. You will discover the benefits, correct usage, types of exercises, and tips to avoid common mistakes, helping you create a consistent and effective home training routine.
Benefits Of Resistance Bands


Resistance bands offer quite a few physical benefits when it comes to strength training. They provide a unique form of resistance that engages muscles differently compared to free weights. For example, the tension increases as you stretch the band, which means your muscles have to work throughout the entire movement, not just at certain points. This continuous resistance can help build muscle strength more evenly.

One notable advantage is how resistance bands support injury recovery, especially for people rehabilitating muscular injuries. They allow controlled progress without putting excessive strain on joints or tissues. I’ve seen many stories where patients use bands to regain mobility safely, particularly after surgeries or cardiac rehab. Bands are also great for increasing flexibility by gently stretching muscles without harsh force.
Why are resistance bands so popular for home workouts? Well, their portability is a major factor—you can pack them in a drawer or take them on trips without hassle. They suit every fitness level because bands come in different tension levels, so beginners and experts alike can tailor the intensity. Plus, you get versatility in exercises; from squats to presses and stretches, a single band goes a long way. They are an affordable option, too, replacing bulky gym gear without compromising workout quality. So, they’re really a practical and adaptable choice if you want effective strength training at home.
Choosing The Right Resistance Band

Overview Of Resistance Band Types
Resistance bands come in a few common varieties, each offering something a bit different. Loop bands—simple circles of elastic—are popular for leg and glute exercises, often favored in lower body workouts. Then there’s tubing with handles, which feel a bit more like traditional weights and are great for upper body training because the handles give you a firm grip. Flat bands, which are wide and flat lengths of elastic, tend to be used in physical therapy or stretching routines and offer a gentler resistance.
Each type has its quirks. Loop bands are compact and easy to store but sometimes challenging to anchor for certain moves. Tubing can be adjusted with handles, but they’re a bit bulkier. Flat bands are simple and versatile but may wear out faster with heavy use. So it kind of depends on your space, the exercises you want, and your personal preference for grip and feel.
How To Pick The Correct Resistance Level
Most resistance bands use a color-coding system to indicate their resistance level. Light colors, like yellow or red, usually mean low resistance, suitable for beginners or those doing rehab work. Darker colors, such as green, blue, or black, represent medium to heavy resistance, better suited for more advanced training or stronger muscle groups.
But be cautious—color codes vary across brands, which can get confusing. The best way to find your perfect fit? Try a few bands and test how much you can stretch before feeling challenged but not strained. If the band snaps back too easily or feels like no effort, it’s too light. If you can barely stretch it at all, it’s probably too heavy. Adjust resistance not just by band thickness or color but also by how you use the band—changing grip position or using multiple bands together can fine-tune your workout.
Ultimately, picking the right band is a balance between your current strength, your goals, and the movements you’re planning. It’s a bit of trial and error but once you find your spot, the bands become a versatile tool for effective training at home.
Setting Up For Resistance Band Workouts

Preparing Your Workspace For Training
Creating a space for resistance band workouts at home isn’t as complicated as you might think. The area should be clear enough so you can stretch out without knocking anything over—think about arm length and movement range. If possible, choose a spot with firm flooring; carpet can sometimes snag bands or cause slipping. Hardwood or rubber mats work well to give a bit of grip and comfort. Lighting is more than just for mood—good visibility helps you check your form and spot any potential hazards. Trust me, working out in a dim corner often leaves you second-guessing every move.
Safety Tips For Using Resistance Bands
Before you even pull a band off the hook, you need to inspect it closely. Look for any cracks, thinning, or discoloration that might hint at weakening rubber. Bands may look fine on the surface but be compromised internally. It’s tempting to skip this step, but a snapped band can cause painful injuries. When anchoring your bands—whether to a door, a sturdy pole, or a piece of furniture—double-check the security. If it slips during an exercise, things can go wrong fast. And warming up your muscles first works wonders in preventing strains. Even just light movements or stretches can prepare your body for the resistance you’re about to apply.
Organizing your area also helps keep your session flow smooth. Store your bands in a dedicated spot, perhaps a box or a drawer, to avoid stretching or harm when not in use. You’ll appreciate this little bit of order, especially on busy days when motivation is low and chaos would just add to the excuse pile.
Basic Resistance Band Exercises

Resistance bands offer a straightforward way to engage most major muscle groups without bulky equipment. You might want to start with these foundational moves:
Leg Press: Sit on the floor, loop the band around your feet. Push your feet forward, stretching the band. This targets quads and hamstrings while improving stability.
Bicep Curl: Stand on the band and hold ends in hands. Curl your arms upwards slowly. It’s effective for arm strength and can be adjusted for all levels.
Seated Row: Anchor the band around sturdy object. Sit with legs extended, pull the band towards your torso. This works back muscles deeply and improves posture.
Plank with Band Reach: Get into plank, loop band around wrists. Extend one arm forward against resistance. This enhances core and shoulder endurance.
Each exercise can be tweaked by adjusting tension or reps, which keeps your routine flexible. Also, these moves enhance your coordination and can be less intimidating if you’re new to home workouts.
Lower Body Exercises With Resistance Bands

Using bands for lower body exercises really shifts how your muscles engage. For instance:
Squats: Place a band above your knees. Performing squats now activates your glutes and outer thighs more, which otherwise might be neglected.
Glute Bridges: Loop the band around your thighs. Raise your hips while pushing knees outward against the band. This specifically targets the glute muscles and lower back.
Leg Press: Lying or seated, loop the band on one foot and press outwards. This strengthens quads, hamstrings, and calves simultaneously.
You might find the muscle activation surprising compared to bodyweight alone, and that’s the benefit of bands—they add that extra challenge with minimal equipment.
Upper Body Workout Examples

Resistance bands are quite versatile for upper body strength too. Consider these examples:
Bicep Curls: Standing on a band, curl your arms with control. This builds arm strength without needing heavy dumbbells.
Shoulder Presses: Stand with one end of the band at your feet, push the band overhead. This targets shoulder muscles and improves coordination.
Rows: Anchor the band, pull towards your torso engaging your back muscles. It’s excellent for posture and upper back strength.
These moves can be done anywhere, making it easier to stick to your routine. Plus, switching tension levels keeps the workout fresh. Maybe you’ll discover you’re stronger than you thought with just a simple band.
Advanced Techniques For Better Results

When you want to kick up the intensity of your resistance band workouts, there’s a few approaches you can try that go beyond just stretching the band thinner. One way is to combine exercises. For example, merging a squat with an overhead press using the band makes your legs, shoulders, and core all work together. It’s a small tweak, but it demands more from your muscles—and can make your session feel more efficient.
Another way to push harder is by increasing repetitions. This might sound basic, but adding even a handful more reps can really squeeze out extra strength gains. Plus, dialing up the reps lets you focus on your form and control under fatigue, which is tricky but valuable.
Then there’s tempo changes—the rhythm of your movements. Slowing down the lowering phase of a pull, for instance, adds time under tension, which can boost muscle development. Or you might pause mid-move, holding the band tight. It interrupts the routine and forces your muscles to stabilize for longer periods.
These techniques can be mixed and matched depending on how you’re feeling and what goals you have in mind. It isn’t about pushing every session to the max but exploring what really challenges you without losing control. That balance feels a little elusive but worth experimenting with.
Combining Exercises For Full Body Workouts
One helpful trick with resistance bands is crafting compound exercises that hit multiple muscle groups simultaneously. For instance, try pairing a row with a bicep curl. You engage your back, arms, and shoulders in one fluid motion. Or combine a chest press with a glute bridge—your upper body and lower body fire off together.
What’s interesting here is that these combined moves mimic real-life patterns better than isolated exercises. They require coordination and spark greater muscle synergy. So, instead of just focusing on one area, you’re indirectly challenging several at once.
Compound resistance band workouts might feel more demanding at first, but they also save time because you’re covering more ground. Plus, they often boost calorie burn, which is a nice bonus if weight management is part of your goal.
Adjusting Resistance And Repetitions
Choosing the right band resistance is crucial for progress. If a band feels too easy and your muscles aren’t really taxed by the end of a set, it’s probably time to bump up to a thicker, tougher band. At the same time, upping your repetitions can keep things challenging even if you stick with the same band. Say you usually do 10 reps—try pushing to 15 or 20.
The sweet spot is where you feel muscle fatigue by the last rep without sacrificing form. That’s the difficult balance to strike, and it varies day to day. Some days you might prefer heavier resistance with fewer reps; other days, lighter bands with more reps.
Adjustments don’t have to be drastic. Small changes in resistance or reps can lead to steady gains over time. Listening to your body, and maybe shaking up the routine every few weeks, helps avoid plateaus and keeps your muscles guessing.
Common Mistakes And How To Fix Them

Using resistance bands can seem straightforward, yet people often slip into errors that reduce effectiveness or cause injury. One common mistake is choosing a band with the wrong resistance level. Beginners might grab a band that’s too strong and struggle, while more experienced users sometimes pick weak bands that don’t challenge muscles. Finding the right tension is key. You can test by doing a few reps to see if you reach fatigue around the intended rep range.
Another frequent error is poor form. For instance, bending wrists during exercises or not controlling the band’s motion. Jerky actions or rapid snapping back can stress joints unnecessarily. It’s better to move slowly, maintain control, and keep wrists neutral. If you notice discomfort, pause and reassess your technique.
To fix these, focus on:
- Choosing the right band color and thickness based on your strength level
- Starting slow and building up resistance gradually
- Maintaining controlled movements with proper wrist alignment
- Monitoring fatigue signals to avoid pushing beyond safe limits
Over time, a conscious effort to tune your form and resistance choice pays dividends in workout quality and safety.
Tracking Progress With Resistance Bands
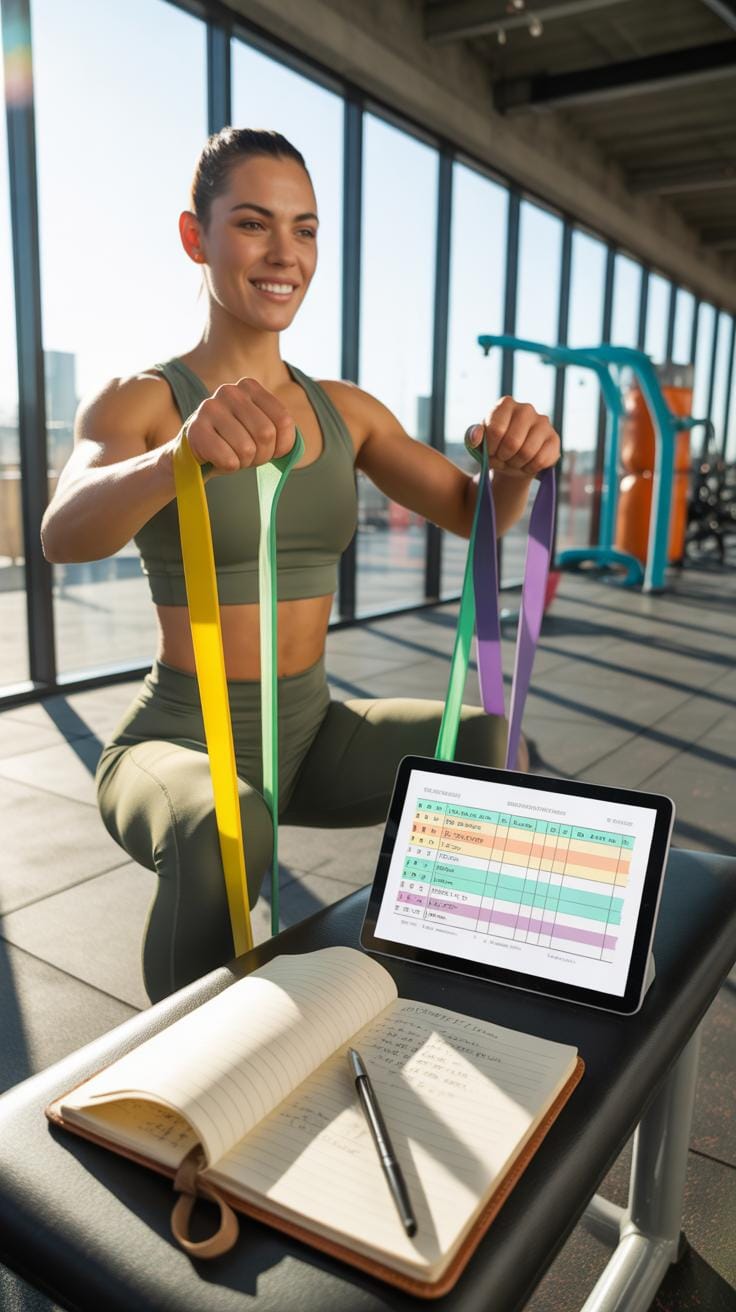
Tracking your strength gains with resistance bands isn’t always straightforward, but it’s doable—and quite rewarding once you get into it. One of the simplest ways to track improvement is by counting your reps. You might start with 10 reps at a certain resistance level, and weeks later, find yourself comfortably pushing 15 or 20. That’s tangible progress right there.
Another key marker is noting when you switch to a thicker band or combine bands for added resistance. It’s easy to forget how much harder you’re working, so jotting down these changes in a fitness journal can be surprisingly motivating. Writing it out doesn’t just capture your increasing strength but also holds you accountable so you won’t skip workout days.
Methods For Measuring Strength Gains
There are a few practical methods to keep track:
- Count how many reps and sets you complete with each workout.
- Log the resistance level or combination of bands used for exercises.
- Note improvements in exercise form or range of motion over time.
- Track how many exercises you can perform without feeling overly fatigued.
These methods can feel a bit manual, but they give a clear, measurable sense of progress—even when the gains are subtle.
Tools To Help Monitor Your Training
If pen and paper aren’t your thing, try using fitness apps that let you log workouts and resistance levels. Some apps are designed specifically for resistance bands, with reminders and progress charts that keep you motivated. Wearable devices can also add value by tracking heart rate and calories burned during your session, giving indirect clues about your conditioning.
Or, if you prefer a visual cue, simple charts or graphs taped to your workout space can make your progress more tangible. Watching those numbers climb is a surprisingly strong motivator. It’s a bit like having a coach on the wall, nudging you forward.
Sample Weekly Resistance Band Workout Plan

Trying to create a balanced weekly workout plan with resistance bands is easier than you might expect. You want enough variety to hit all major muscle groups over the week, but not so much that it feels overwhelming or complicated. Here’s a simple schedule aimed at beginners to intermediate users.
Monday: Focus on upper body — think bicep curls, shoulder presses, and rows. Aim for 2-3 sets of 10-12 reps each. Take 30-60 seconds rest between sets.
Tuesday: Lower body day — squats, glute bridges, and leg extensions. Same rep and set scheme. Rest is crucial, but keep moving.
Wednesday: Active rest or light stretching to help recovery.
Thursday: Core and balance with resistance band twists, planks with band pulls, and leg raises.
Friday: Combine upper and lower body in a full-body circuit — circuit 2-3 rounds with 10 reps per exercise.
Weekend: Rest or gentle walks. Muscles need time to rebuild.
Adjust volume by adding sets, reps, or moving to thicker bands as you get stronger. The key? Listen to your body and avoid overdoing it early on.
Conclusions
Resistance bands provide a versatile and effective solution for strengthening muscles at home. They allow you to perform various exercises targeting different muscle groups while adjusting resistance to your fitness level. Compared to traditional equipment, resistance bands are affordable, lightweight, and easy to store.
To get the best results, incorporate a mix of exercises and gradually increase resistance or repetitions. Being consistent and mindful of your technique will help you avoid injuries and build strength steadily. Resistance bands are a practical tool for anyone seeking convenient home training options.